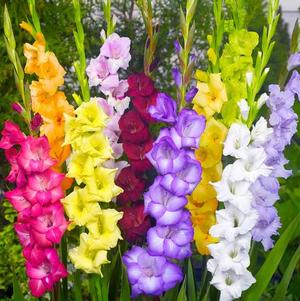
Large Flowering Glad
Large Flowering Glad
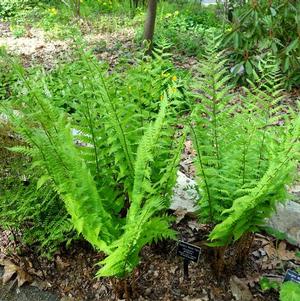
Dryopteris Goldieana 'Goldie's Giant Wood'
Goldie's Giant Wood Fern
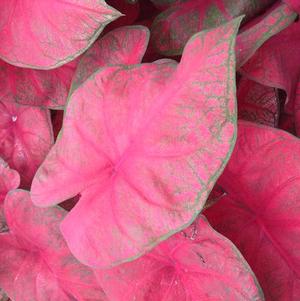
Caladium Fancy Leaf 'Brandywine'
Caladium

Soil and Preparation:
Gladioli are one of the easiest flowers to grow. They do well in a wide range of soil types – provided drainage is good, but they grow best in soil with a pH of 6.5 to 7. Most garden soil that will produce a good crop of vegetables or weeds will also grow good glads with little or no added fertilizer. Glads prefer full sunlight, but will do reasonably well with a little high shade in early morning or late afternoon. Good circulation is desirable, so stay away from buildings or other obstructions, which might impede airflow. Plow, rototill, or spade your soil as you would for any other garden plants. It is best to move your glad plantings from one area to another each year to help prevent carryover of diseases in the soil. If soil tests or other reliable indicators point to a lack of nutrients, a balanced commercial fertilizer such as 5-10-10 may be incorporated into the soil immediately prior to planting, at a rate of 2- 3 pounds per 100 square feet. Avoid over-fertilizing. Composted animal manure or leaves should only be worked into the soil in the fall.
Planting:
Your first planting should be when you would normally plant sweet corn in your area. Corms (commonly called bulbs) planted in cold soils are apt to rot before they begin to grow. Subsequent plantings at two-week intervals will ensure bloom over a long period of time. We recommend planting corms three to five inches deep and from four to six inches apart, in rows spaced 12-36 inches apart. Insecticide spread in the trench before covering will discourage underground insects. Before glads bloom, hilling soil six inches up around the stalk helps prevent the glads from tipping over during storms. If drainage is a problem in your soil, rows should be raised to facilitate the process. Soggy, compacted soil will hamper root growth and contribute to root rot.
Watering:
Remember that glads need plenty of water, but will not tolerate wet feet. Lack of water inhibits spike growth, flower development and bulb growth. At least an inch of water per week is a good guideline.
Fertilization During Growing:
Before starting any fertilization program, always test the soil for nutrient content. The application of fertilizer should coincide with crop needs. We recommend starting fertilization when the third or fourth leaf is visible. Amounts will vary according to the soil test, but for poor, light soil you may use a fertilizer of 5-10-10 again, or just nitrogen if the nutrient content of your soil is balanced. You would apply this as a side dressing.
Weed and Insect Control:
Weed by shallow cultivation and hand weeding. If available, a light mulch of straw, grass clippings, etc. between rows will discourage weeds and help conserve moisture. Insect control is important in growing glads. Pests include thrip, which is by far the most damaging. Thrip are tiny insects, tan to black in color and less than 1/8” in length. They can be controlled by several good combination sprays and dusts, including organic products, and are available at your local garden centers. If you chose organic products, more frequent applications will be needed.
Digging Corms (Bulbs):
If you live where the ground does not freeze in the winter, you may choose not to dig your corms; however, disease and crowding may reduce the amount and quality of your bloom. You should remove plant tops 6-8 weeks after bloom and remove them from the garden to prevent the spread of disease. It is suggested that you dig and divide your corms every couple of years, being sure to discard any damaged or diseased corms. If you live where the ground freezes, you will need to dig your corms each year, or if you choose not to dig, purchase new corms in the spring. Corms should be lifted in the fall before the onset of freezing weather. About 6-8 weeks after blooming, the corms may be harvested by loosening the soil with a spade or digging fork so that the plants can be pulled up by hand. The plant should be separated from the corm as close to the corm as possible, either by hand breaking or by cutting with pruning shears. You should remove the old plant tops from the field to prevent carryover of disease. The corms should be cleaned or rinsed off with running water, and then spread out to dry in shallow layers in trays or porous bags in an airy location that will not freeze for a period of 2 to 3 weeks. During this time a cork layer forms between the new corm and the old mother corm and roots. Break off and discard this old corm as soon as possible. Undue delay in cleaning results in greater difficulty in removal of the old corm.
Corm Storage:
After cleaning, corms should be lightly dusted with a combination fungicide/insecticide dust, placed in shallow trays, mesh bags or open paper bags to be stored for the winter. Do not use any covering material. A well-ventilated root cellar is ideal, but any room with good air circulation in the average home basement will suffice if temperatures can be kept between 35-50 degrees. The lower temperature is best, as long as they do not freeze.
More Details
Soil and Preparation:
Gladioli are one of the easiest flowers to grow. They do well in a wide range of soil types – provided drainage is good, but they grow best in soil with a pH of 6.5 to 7. Most garden soil that will produce a good crop of vegetables or weeds will also grow good glads with little or no added fertilizer. Glads prefer full sunlight, but will do reasonably well with a little high shade in early morning or late afternoon. Good circulation is desirable, so stay away from buildings or other obstructions, which might impede airflow. Plow, rototill, or spade your soil as you would for any other garden plants. It is best to move your glad plantings from one area to another each year to help prevent carryover of diseases in the soil. If soil tests or other reliable indicators point to a lack of nutrients, a balanced commercial fertilizer such as 5-10-10 may be incorporated into the soil immediately prior to planting, at a rate of 2- 3 pounds per 100 square feet. Avoid over-fertilizing. Composted animal manure or leaves should only be worked into the soil in the fall.
Planting:
Your first planting should be when you would normally plant sweet corn in your area. Corms (commonly called bulbs) planted in cold soils are apt to rot before they begin to grow. Subsequent plantings at two-week intervals will ensure bloom over a long period of time. We recommend planting corms three to five inches deep and from four to six inches apart, in rows spaced 12-36 inches apart. Insecticide spread in the trench before covering will discourage underground insects. Before glads bloom, hilling soil six inches up around the stalk helps prevent the glads from tipping over during storms. If drainage is a problem in your soil, rows should be raised to facilitate the process. Soggy, compacted soil will hamper root growth and contribute to root rot.
Watering:
Remember that glads need plenty of water, but will not tolerate wet feet. Lack of water inhibits spike growth, flower development and bulb growth. At least an inch of water per week is a good guideline.
Fertilization During Growing:
Before starting any fertilization program, always test the soil for nutrient content. The application of fertilizer should coincide with crop needs. We recommend starting fertilization when the third or fourth leaf is visible. Amounts will vary according to the soil test, but for poor, light soil you may use a fertilizer of 5-10-10 again, or just nitrogen if the nutrient content of your soil is balanced. You would apply this as a side dressing.
Weed and Insect Control:
Weed by shallow cultivation and hand weeding. If available, a light mulch of straw, grass clippings, etc. between rows will discourage weeds and help conserve moisture. Insect control is important in growing glads. Pests include thrip, which is by far the most damaging. Thrip are tiny insects, tan to black in color and less than 1/8” in length. They can be controlled by several good combination sprays and dusts, including organic products, and are available at your local garden centers. If you chose organic products, more frequent applications will be needed.
Digging Corms (Bulbs):
If you live where the ground does not freeze in the winter, you may choose not to dig your corms; however, disease and crowding may reduce the amount and quality of your bloom. You should remove plant tops 6-8 weeks after bloom and remove them from the garden to prevent the spread of disease. It is suggested that you dig and divide your corms every couple of years, being sure to discard any damaged or diseased corms. If you live where the ground freezes, you will need to dig your corms each year, or if you choose not to dig, purchase new corms in the spring. Corms should be lifted in the fall before the onset of freezing weather. About 6-8 weeks after blooming, the corms may be harvested by loosening the soil with a spade or digging fork so that the plants can be pulled up by hand. The plant should be separated from the corm as close to the corm as possible, either by hand breaking or by cutting with pruning shears. You should remove the old plant tops from the field to prevent carryover of disease. The corms should be cleaned or rinsed off with running water, and then spread out to dry in shallow layers in trays or porous bags in an airy location that will not freeze for a period of 2 to 3 weeks. During this time a cork layer forms between the new corm and the old mother corm and roots. Break off and discard this old corm as soon as possible. Undue delay in cleaning results in greater difficulty in removal of the old corm.
Corm Storage:
After cleaning, corms should be lightly dusted with a combination fungicide/insecticide dust, placed in shallow trays, mesh bags or open paper bags to be stored for the winter. Do not use any covering material. A well-ventilated root cellar is ideal, but any room with good air circulation in the average home basement will suffice if temperatures can be kept between 35-50 degrees. The lower temperature is best, as long as they do not freeze.
More DetailsSoil and Preparation:
Gladioli are one of the easiest flowers to grow. They do well in a wide range of soil types – provided drainage is good, but they grow best in soil with a pH of 6.5 to 7. Most garden soil that will produce a good crop of vegetables or weeds will also grow good glads with little or no added fertilizer. Glads prefer full sunlight, but will do reasonably well with a little high shade in early morning or late afternoon. Good circulation is desirable, so stay away from buildings or other obstructions, which might impede airflow. Plow, rototill, or spade your soil as you would for any other garden plants. It is best to move your glad plantings from one area to another each year to help prevent carryover of diseases in the soil. If soil tests or other reliable indicators point to a lack of nutrients, a balanced commercial fertilizer such as 5-10-10 may be incorporated into the soil immediately prior to planting, at a rate of 2- 3 pounds per 100 square feet. Avoid over-fertilizing. Composted animal manure or leaves should only be worked into the soil in the fall.
Planting:
Your first planting should be when you would normally plant sweet corn in your area. Corms (commonly called bulbs) planted in cold soils are apt to rot before they begin to grow. Subsequent plantings at two-week intervals will ensure bloom over a long period of time. We recommend planting corms three to five inches deep and from four to six inches apart, in rows spaced 12-36 inches apart. Insecticide spread in the trench before covering will discourage underground insects. Before glads bloom, hilling soil six inches up around the stalk helps prevent the glads from tipping over during storms. If drainage is a problem in your soil, rows should be raised to facilitate the process. Soggy, compacted soil will hamper root growth and contribute to root rot.
Watering:
Remember that glads need plenty of water, but will not tolerate wet feet. Lack of water inhibits spike growth, flower development and bulb growth. At least an inch of water per week is a good guideline.
Fertilization During Growing:
Before starting any fertilization program, always test the soil for nutrient content. The application of fertilizer should coincide with crop needs. We recommend starting fertilization when the third or fourth leaf is visible. Amounts will vary according to the soil test, but for poor, light soil you may use a fertilizer of 5-10-10 again, or just nitrogen if the nutrient content of your soil is balanced. You would apply this as a side dressing.
Weed and Insect Control:
Weed by shallow cultivation and hand weeding. If available, a light mulch of straw, grass clippings, etc. between rows will discourage weeds and help conserve moisture. Insect control is important in growing glads. Pests include thrip, which is by far the most damaging. Thrip are tiny insects, tan to black in color and less than 1/8” in length. They can be controlled by several good combination sprays and dusts, including organic products, and are available at your local garden centers. If you chose organic products, more frequent applications will be needed.
Digging Corms (Bulbs):
If you live where the ground does not freeze in the winter, you may choose not to dig your corms; however, disease and crowding may reduce the amount and quality of your bloom. You should remove plant tops 6-8 weeks after bloom and remove them from the garden to prevent the spread of disease. It is suggested that you dig and divide your corms every couple of years, being sure to discard any damaged or diseased corms. If you live where the ground freezes, you will need to dig your corms each year, or if you choose not to dig, purchase new corms in the spring. Corms should be lifted in the fall before the onset of freezing weather. About 6-8 weeks after blooming, the corms may be harvested by loosening the soil with a spade or digging fork so that the plants can be pulled up by hand. The plant should be separated from the corm as close to the corm as possible, either by hand breaking or by cutting with pruning shears. You should remove the old plant tops from the field to prevent carryover of disease. The corms should be cleaned or rinsed off with running water, and then spread out to dry in shallow layers in trays or porous bags in an airy location that will not freeze for a period of 2 to 3 weeks. During this time a cork layer forms between the new corm and the old mother corm and roots. Break off and discard this old corm as soon as possible. Undue delay in cleaning results in greater difficulty in removal of the old corm.
Corm Storage:
After cleaning, corms should be lightly dusted with a combination fungicide/insecticide dust, placed in shallow trays, mesh bags or open paper bags to be stored for the winter. Do not use any covering material. A well-ventilated root cellar is ideal, but any room with good air circulation in the average home basement will suffice if temperatures can be kept between 35-50 degrees. The lower temperature is best, as long as they do not freeze.
More Details
Soil and Preparation:
Gladioli are one of the easiest flowers to grow. They do well in a wide range of soil types – provided drainage is good, but they grow best in soil with a pH of 6.5 to 7. Most garden soil that will produce a good crop of vegetables or weeds will also grow good glads with little or no added fertilizer. Glads prefer full sunlight, but will do reasonably well with a little high shade in early morning or late afternoon. Good circulation is desirable, so stay away from buildings or other obstructions, which might impede airflow. Plow, rototill, or spade your soil as you would for any other garden plants. It is best to move your glad plantings from one area to another each year to help prevent carryover of diseases in the soil. If soil tests or other reliable indicators point to a lack of nutrients, a balanced commercial fertilizer such as 5-10-10 may be incorporated into the soil immediately prior to planting, at a rate of 2- 3 pounds per 100 square feet. Avoid over-fertilizing. Composted animal manure or leaves should only be worked into the soil in the fall.
Planting:
Your first planting should be when you would normally plant sweet corn in your area. Corms (commonly called bulbs) planted in cold soils are apt to rot before they begin to grow. Subsequent plantings at two-week intervals will ensure bloom over a long period of time. We recommend planting corms three to five inches deep and from four to six inches apart, in rows spaced 12-36 inches apart. Insecticide spread in the trench before covering will discourage underground insects. Before glads bloom, hilling soil six inches up around the stalk helps prevent the glads from tipping over during storms. If drainage is a problem in your soil, rows should be raised to facilitate the process. Soggy, compacted soil will hamper root growth and contribute to root rot.
Watering:
Remember that glads need plenty of water, but will not tolerate wet feet. Lack of water inhibits spike growth, flower development and bulb growth. At least an inch of water per week is a good guideline.
Fertilization During Growing:
Before starting any fertilization program, always test the soil for nutrient content. The application of fertilizer should coincide with crop needs. We recommend starting fertilization when the third or fourth leaf is visible. Amounts will vary according to the soil test, but for poor, light soil you may use a fertilizer of 5-10-10 again, or just nitrogen if the nutrient content of your soil is balanced. You would apply this as a side dressing.
Weed and Insect Control:
Weed by shallow cultivation and hand weeding. If available, a light mulch of straw, grass clippings, etc. between rows will discourage weeds and help conserve moisture. Insect control is important in growing glads. Pests include thrip, which is by far the most damaging. Thrip are tiny insects, tan to black in color and less than 1/8” in length. They can be controlled by several good combination sprays and dusts, including organic products, and are available at your local garden centers. If you chose organic products, more frequent applications will be needed.
Digging Corms (Bulbs):
If you live where the ground does not freeze in the winter, you may choose not to dig your corms; however, disease and crowding may reduce the amount and quality of your bloom. You should remove plant tops 6-8 weeks after bloom and remove them from the garden to prevent the spread of disease. It is suggested that you dig and divide your corms every couple of years, being sure to discard any damaged or diseased corms. If you live where the ground freezes, you will need to dig your corms each year, or if you choose not to dig, purchase new corms in the spring. Corms should be lifted in the fall before the onset of freezing weather. About 6-8 weeks after blooming, the corms may be harvested by loosening the soil with a spade or digging fork so that the plants can be pulled up by hand. The plant should be separated from the corm as close to the corm as possible, either by hand breaking or by cutting with pruning shears. You should remove the old plant tops from the field to prevent carryover of disease. The corms should be cleaned or rinsed off with running water, and then spread out to dry in shallow layers in trays or porous bags in an airy location that will not freeze for a period of 2 to 3 weeks. During this time a cork layer forms between the new corm and the old mother corm and roots. Break off and discard this old corm as soon as possible. Undue delay in cleaning results in greater difficulty in removal of the old corm.
Corm Storage:
After cleaning, corms should be lightly dusted with a combination fungicide/insecticide dust, placed in shallow trays, mesh bags or open paper bags to be stored for the winter. Do not use any covering material. A well-ventilated root cellar is ideal, but any room with good air circulation in the average home basement will suffice if temperatures can be kept between 35-50 degrees. The lower temperature is best, as long as they do not freeze.
More Details