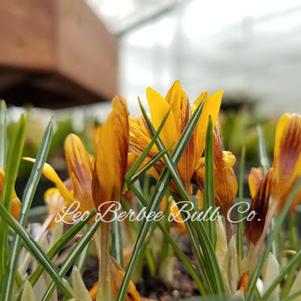
Follow us on Facebook
You are using an outdated browser. For a faster, safer browsing experience, upgrade for free today.
Availability Status
Categories
Popular products

Oxalis Regnelli Regnelli White

Oxalis Regnelli 'Regnelli White'

Regnelli White - Pre-Order for Fall 2024

Storage After Arrival

Before planting, rhizomes can be stored up to 4 weeks at 40-50⁰F. Be sure to keep them covered so they do not dry out.

Planting

Use a well drained, sterilized planting medium. Ideal pH should be 6.5 and no lower. Plant 3 rhizomes per 4" pot; 4 rhizomes per 5" pot.
Lay the corms (roots) flat and cover with 1/2" of soil medium. Fafard #2 and Metro Mix 350 are the best suited soils.
Avoid any soil which contains bark. Can be placed pot to pot when grown on benches until leaves start, then space 8" on center.

Watering

Water the medium thoroughly, then only water the medium when it becomes dry and/or the plants begin to grow vigorously. DO NOT OVERWATER.

Fertilizer

Because oxalis grow fast, they need to have sufficient fertilizer. Use a complete NPK fertilizer on a weekly basis once the plants begin to
grow vigorously. Either 200 ppm of 20-20-20 or 14-14-14 Osmocote can be used. If any chlorosis begins to appear in the oldest leaves,
use a micronutrient foliage spray. If the foliage is yellowing this could be a nitrogen deficiency problem.

Light Requirements

Use a medium light (2500-5000 ft. candle) intensity greenhouse that is well ventilated.

Temperature

In order to assure proper germination, start Regnelli White at 68-75⁰F - Triangularis & Fanny at 72-78⁰F. The plants grow well in full sun or light shade at temperatures between 70-75⁰F. If grown at lower than 65⁰F or higher than 85⁰F the plants may suffer. If flowers bloom down in the foliage, the plant has probably been grown with too much shade. Once the plants show vigorous growth the temperature may be lowered to 65⁰F.

Height Control for Pots

Height control - Bonzi drenches proved to be the most effective of all treatments for suppressing plant height in regnelli and triangularis. Sumagic drenches of 0.10 mg/pot were as effective as the Bonzi treatments in reducing the height of regnelli pink. The other concentrations of Sumagic did reduce the height in both varieties, but their effects were not as noticeable as were the Bonzi treatments. It was also determined that A'Rest should not be used on these species due to its cost and inactivity. Oxalis growers can use Bonzi drenches in the range of 0.05 to 0.1 mg/4 1/2" pot to "stop" further growth once a desired height is reached. Early drenching of Bonzi is to be avoided since this would probably cause severe stunting.

Insects

Oxalis are almost disease free, but will attract insects in warmer temperatures. The following product is advised for spiders - Pentac 50
wettable powder - 8 ounces per 100 gallons of water, 2 applications per week for two weeks.

Marketing

Plants are ready to market when foliage is fully expanded. It is not necessary to have flowers present.

More Details
Pre-Order
Oxalis Tetraphylla Deppii

Oxalis Tetraphylla 'Deppii'

Iron Cross - Pre-Order for Fall 2024

Storage After Arrival

Before planting, rhizomes can be stored up to 4 weeks at 40-50⁰F. Be sure to keep them covered so they do not dry out.

Planting

Use a well drained, sterilized planting medium. Ideal pH should be 6.5 and no lower. Plant 3 rhizomes per 4" pot; 4 rhizomes per 5" pot.
Lay the corms (roots) flat and cover with 1/2" of soil medium. Fafard #2 and Metro Mix 350 are the best suited soils.
Avoid any soil which contains bark. Can be placed pot to pot when grown on benches until leaves start, then space 8" on center.

Watering

Water the medium thoroughly, then only water the medium when it becomes dry and/or the plants begin to grow vigorously. DO NOT OVERWATER.

Fertilizer

Because oxalis grow fast, they need to have sufficient fertilizer. Use a complete NPK fertilizer on a weekly basis once the plants begin to
grow vigorously. Either 200 ppm of 20-20-20 or 14-14-14 Osmocote can be used. If any chlorosis begins to appear in the oldest leaves,
use a micronutrient foliage spray. If the foliage is yellowing this could be a nitrogen deficiency problem.

Light Requirements

Use a medium light (2500-5000 ft. candle) intensity greenhouse that is well ventilated.

Temperature

In order to assure proper germination, start Regnelli White at 68-75⁰F - Triangularis & Fanny at 72-78⁰F. The plants grow well in full sun or light shade at temperatures between 70-75⁰F. If grown at lower than 65⁰F or higher than 85⁰F the plants may suffer. If flowers bloom down in the foliage, the plant has probably been grown with too much shade. Once the plants show vigorous growth the temperature may be lowered to 65⁰F.

Height Control for Pots

Height control - Bonzi drenches proved to be the most effective of all treatments for suppressing plant height in regnelli and triangularis. Sumagic drenches of 0.10 mg/pot were as effective as the Bonzi treatments in reducing the height of regnelli pink. The other concentrations of Sumagic did reduce the height in both varieties, but their effects were not as noticeable as were the Bonzi treatments. It was also determined that A'Rest should not be used on these species due to its cost and inactivity. Oxalis growers can use Bonzi drenches in the range of 0.05 to 0.1 mg/4 1/2" pot to "stop" further growth once a desired height is reached. Early drenching of Bonzi is to be avoided since this would probably cause severe stunting.

Insects

Oxalis are almost disease free, but will attract insects in warmer temperatures. The following product is advised for spiders - Pentac 50
wettable powder - 8 ounces per 100 gallons of water, 2 applications per week for two weeks.

Marketing

Plants are ready to market when foliage is fully expanded. It is not necessary to have flowers present.

More Details
Pre-Order
Oxalis Triangularis Myke

Oxalis Triangularis 'Myke'

Myke - Pre-Order for Fall 2024

Storage After Arrival

Before planting, rhizomes can be stored up to 4 weeks at 40-50⁰F. Be sure to keep them covered so they do not dry out.

Planting

Use a well drained, sterilized planting medium. Ideal pH should be 6.5 and no lower. Plant 3 rhizomes per 4" pot; 4 rhizomes per 5" pot.
Lay the corms (roots) flat and cover with 1/2" of soil medium. Fafard #2 and Metro Mix 350 are the best suited soils.
Avoid any soil which contains bark. Can be placed pot to pot when grown on benches until leaves start, then space 8" on center.

Watering

Water the medium thoroughly, then only water the medium when it becomes dry and/or the plants begin to grow vigorously. DO NOT OVERWATER.

Fertilizer

Because oxalis grow fast, they need to have sufficient fertilizer. Use a complete NPK fertilizer on a weekly basis once the plants begin to
grow vigorously. Either 200 ppm of 20-20-20 or 14-14-14 Osmocote can be used. If any chlorosis begins to appear in the oldest leaves,
use a micronutrient foliage spray. If the foliage is yellowing this could be a nitrogen deficiency problem.

Light Requirements

Use a medium light (2500-5000 ft. candle) intensity greenhouse that is well ventilated.

Temperature

In order to assure proper germination, start Regnelli White at 68-75⁰F - Triangularis & Fanny at 72-78⁰F. The plants grow well in full sun or light shade at temperatures between 70-75⁰F. If grown at lower than 65⁰F or higher than 85⁰F the plants may suffer. If flowers bloom down in the foliage, the plant has probably been grown with too much shade. Once the plants show vigorous growth the temperature may be lowered to 65⁰F.

Height Control for Pots

Height control - Bonzi drenches proved to be the most effective of all treatments for suppressing plant height in regnelli and triangularis. Sumagic drenches of 0.10 mg/pot were as effective as the Bonzi treatments in reducing the height of regnelli pink. The other concentrations of Sumagic did reduce the height in both varieties, but their effects were not as noticeable as were the Bonzi treatments. It was also determined that A'Rest should not be used on these species due to its cost and inactivity. Oxalis growers can use Bonzi drenches in the range of 0.05 to 0.1 mg/4 1/2" pot to "stop" further growth once a desired height is reached. Early drenching of Bonzi is to be avoided since this would probably cause severe stunting.

Insects

Oxalis are almost disease free, but will attract insects in warmer temperatures. The following product is advised for spiders - Pentac 50
wettable powder - 8 ounces per 100 gallons of water, 2 applications per week for two weeks.

Marketing

Plants are ready to market when foliage is fully expanded. It is not necessary to have flowers present.

More Details
Pre-Order
Oxalis Triangularis Regnelli Pink

Oxalis Triangularis 'Regnelli Pink'

Regnelli Pink - Pre-Order for Fall 2024

Storage After Arrival

Before planting, rhizomes can be stored up to 4 weeks at 40-50⁰F. Be sure to keep them covered so they do not dry out.

Planting

Use a well drained, sterilized planting medium. Ideal pH should be 6.5 and no lower. Plant 3 rhizomes per 4" pot; 4 rhizomes per 5" pot.
Lay the corms (roots) flat and cover with 1/2" of soil medium. Fafard #2 and Metro Mix 350 are the best suited soils.
Avoid any soil which contains bark. Can be placed pot to pot when grown on benches until leaves start, then space 8" on center.

Watering

Water the medium thoroughly, then only water the medium when it becomes dry and/or the plants begin to grow vigorously. DO NOT OVERWATER.

Fertilizer

Because oxalis grow fast, they need to have sufficient fertilizer. Use a complete NPK fertilizer on a weekly basis once the plants begin to
grow vigorously. Either 200 ppm of 20-20-20 or 14-14-14 Osmocote can be used. If any chlorosis begins to appear in the oldest leaves,
use a micronutrient foliage spray. If the foliage is yellowing this could be a nitrogen deficiency problem.

Light Requirements

Use a medium light (2500-5000 ft. candle) intensity greenhouse that is well ventilated.

Temperature

In order to assure proper germination, start Regnelli White at 68-75⁰F - Triangularis & Fanny at 72-78⁰F. The plants grow well in full sun or light shade at temperatures between 70-75⁰F. If grown at lower than 65⁰F or higher than 85⁰F the plants may suffer. If flowers bloom down in the foliage, the plant has probably been grown with too much shade. Once the plants show vigorous growth the temperature may be lowered to 65⁰F.

Height Control for Pots

Height control - Bonzi drenches proved to be the most effective of all treatments for suppressing plant height in regnelli and triangularis. Sumagic drenches of 0.10 mg/pot were as effective as the Bonzi treatments in reducing the height of regnelli pink. The other concentrations of Sumagic did reduce the height in both varieties, but their effects were not as noticeable as were the Bonzi treatments. It was also determined that A'Rest should not be used on these species due to its cost and inactivity. Oxalis growers can use Bonzi drenches in the range of 0.05 to 0.1 mg/4 1/2" pot to "stop" further growth once a desired height is reached. Early drenching of Bonzi is to be avoided since this would probably cause severe stunting.

Insects

Oxalis are almost disease free, but will attract insects in warmer temperatures. The following product is advised for spiders - Pentac 50
wettable powder - 8 ounces per 100 gallons of water, 2 applications per week for two weeks.

Marketing

Plants are ready to market when foliage is fully expanded. It is not necessary to have flowers present.

More Details
Pre-Order
Peony lactiflora Barbara

Peony lactiflora 'Barbara'

Peony - Pre-Order for Fall 2024

Soil and Preparation

Peonies prefer well-draining, humus-rich moist soil. Amend heavy or very sandy soil with compost. Additionally, 1 cup of bonemeal can be used to amend the soil prior to planting. Choose a location in full sun, but one that provides ample growing room along with protection from strong winds.

Planting

Dig a a hole large enough to accommodate the roots and set the root so the eyes face upward. Fill in the hole, making sure to keep the peony's eyes/buds not deeper than 2" below the soil line. Water thoroughly to settle the soil around the roots.

Fertilization During Growing

They do not require fertilization other than a yearly addition of compost unless a soil test shows a deficiency in nutrients.

Cutting Guidelines

Years 1 & 2: Do not cut any blooms.  Dis-budding is recommended to encourage root growth and overall plant development.

Year 3: For 2/3 eye roots - Cut 1/3 of the total blooms; For 3/5 eye roots - Cut 50% of the blooms

Year 4: Cut 70% of the total blooms

More Details
Pre-Order
Peony lactiflora Big Ben

Peony lactiflora 'Big Ben'

Peony - Pre-Order for Fall 2024

Soil and Preparation

Peonies prefer well-draining, humus-rich moist soil. Amend heavy or very sandy soil with compost. Additionally, 1 cup of bonemeal can be used to amend the soil prior to planting. Choose a location in full sun, but one that provides ample growing room along with protection from strong winds.

Planting

Dig a a hole large enough to accommodate the roots and set the root so the eyes face upward. Fill in the hole, making sure to keep the peony's eyes/buds not deeper than 2" below the soil line. Water thoroughly to settle the soil around the roots.

Fertilization During Growing

They do not require fertilization other than a yearly addition of compost unless a soil test shows a deficiency in nutrients.

Cutting Guidelines

Years 1 & 2: Do not cut any blooms.  Dis-budding is recommended to encourage root growth and overall plant development.

Year 3: For 2/3 eye roots - Cut 1/3 of the total blooms; For 3/5 eye roots - Cut 50% of the blooms

Year 4: Cut 70% of the total blooms

More Details
Pre-Order
Peony lactiflora Coral Charm

Peony lactiflora 'Coral Charm'

Peony - Pre-Order for Fall 2024

Soil and Preparation

Peonies prefer well-draining, humus-rich moist soil. Amend heavy or very sandy soil with compost. Additionally, 1 cup of bonemeal can be used to amend the soil prior to planting. Choose a location in full sun, but one that provides ample growing room along with protection from strong winds.

Planting

Dig a a hole large enough to accommodate the roots and set the root so the eyes face upward. Fill in the hole, making sure to keep the peony's eyes/buds not deeper than 2" below the soil line. Water thoroughly to settle the soil around the roots.

Fertilization During Growing

They do not require fertilization other than a yearly addition of compost unless a soil test shows a deficiency in nutrients.

Cutting Guidelines

Years 1 & 2: Do not cut any blooms.  Dis-budding is recommended to encourage root growth and overall plant development.

Year 3: For 2/3 eye roots - Cut 1/3 of the total blooms; For 3/5 eye roots - Cut 50% of the blooms

Year 4: Cut 70% of the total blooms

More Details
Pre-Order
Peony lactiflora Coral Sunset

Peony lactiflora 'Coral Sunset'

Peony - Pre-Order for Fall 2024

Soil and Preparation

Peonies prefer well-draining, humus-rich moist soil. Amend heavy or very sandy soil with compost. Additionally, 1 cup of bonemeal can be used to amend the soil prior to planting. Choose a location in full sun, but one that provides ample growing room along with protection from strong winds.

Planting

Dig a a hole large enough to accommodate the roots and set the root so the eyes face upward. Fill in the hole, making sure to keep the peony's eyes/buds not deeper than 2" below the soil line. Water thoroughly to settle the soil around the roots.

Fertilization During Growing

They do not require fertilization other than a yearly addition of compost unless a soil test shows a deficiency in nutrients.

Cutting Guidelines

Years 1 & 2: Do not cut any blooms.  Dis-budding is recommended to encourage root growth and overall plant development.

Year 3: For 2/3 eye roots - Cut 1/3 of the total blooms; For 3/5 eye roots - Cut 50% of the blooms

Year 4: Cut 70% of the total blooms

More Details
Pre-Order
Peony lactiflora Dr. Alexander Fleming

Peony lactiflora 'Dr. Alexander Fleming'

Peony - Pre-Order for Fall 2024

Soil and Preparation

Peonies prefer well-draining, humus-rich moist soil. Amend heavy or very sandy soil with compost. Additionally, 1 cup of bonemeal can be used to amend the soil prior to planting. Choose a location in full sun, but one that provides ample growing room along with protection from strong winds.

Planting

Dig a a hole large enough to accommodate the roots and set the root so the eyes face upward. Fill in the hole, making sure to keep the peony's eyes/buds not deeper than 2" below the soil line. Water thoroughly to settle the soil around the roots.

Fertilization During Growing

They do not require fertilization other than a yearly addition of compost unless a soil test shows a deficiency in nutrients.

Cutting Guidelines

Years 1 & 2: Do not cut any blooms.  Dis-budding is recommended to encourage root growth and overall plant development.

Year 3: For 2/3 eye roots - Cut 1/3 of the total blooms; For 3/5 eye roots - Cut 50% of the blooms

Year 4: Cut 70% of the total blooms

More Details
Pre-Order
Peony lactiflora Duchess de Nemours

Peony lactiflora 'Duchess de Nemours'

Peony - Pre-Order for Fall 2024

Soil and Preparation

Peonies prefer well-draining, humus-rich moist soil. Amend heavy or very sandy soil with compost. Additionally, 1 cup of bonemeal can be used to amend the soil prior to planting. Choose a location in full sun, but one that provides ample growing room along with protection from strong winds.

Planting

Dig a a hole large enough to accommodate the roots and set the root so the eyes face upward. Fill in the hole, making sure to keep the peony's eyes/buds not deeper than 2" below the soil line. Water thoroughly to settle the soil around the roots.

Fertilization During Growing

They do not require fertilization other than a yearly addition of compost unless a soil test shows a deficiency in nutrients.

Cutting Guidelines

Years 1 & 2: Do not cut any blooms.  Dis-budding is recommended to encourage root growth and overall plant development.

Year 3: For 2/3 eye roots - Cut 1/3 of the total blooms; For 3/5 eye roots - Cut 50% of the blooms

Year 4: Cut 70% of the total blooms

More Details
Pre-Order
Peony lactiflora Festiva Maxima

Peony lactiflora 'Festiva Maxima'

Peony - Pre-Order for Fall 2024

Soil and Preparation

Peonies prefer well-draining, humus-rich moist soil. Amend heavy or very sandy soil with compost. Additionally, 1 cup of bonemeal can be used to amend the soil prior to planting. Choose a location in full sun, but one that provides ample growing room along with protection from strong winds.

Planting

Dig a a hole large enough to accommodate the roots and set the root so the eyes face upward. Fill in the hole, making sure to keep the peony's eyes/buds not deeper than 2" below the soil line. Water thoroughly to settle the soil around the roots.

Fertilization During Growing

They do not require fertilization other than a yearly addition of compost unless a soil test shows a deficiency in nutrients.

Cutting Guidelines

Years 1 & 2: Do not cut any blooms.  Dis-budding is recommended to encourage root growth and overall plant development.

Year 3: For 2/3 eye roots - Cut 1/3 of the total blooms; For 3/5 eye roots - Cut 50% of the blooms

Year 4: Cut 70% of the total blooms

More Details
Pre-Order
Peony lactiflora Kansas

Peony lactiflora 'Kansas'

Peony - Pre-Order for Fall 2024

Soil and Preparation

Peonies prefer well-draining, humus-rich moist soil. Amend heavy or very sandy soil with compost. Additionally, 1 cup of bonemeal can be used to amend the soil prior to planting. Choose a location in full sun, but one that provides ample growing room along with protection from strong winds.

Planting

Dig a a hole large enough to accommodate the roots and set the root so the eyes face upward. Fill in the hole, making sure to keep the peony's eyes/buds not deeper than 2" below the soil line. Water thoroughly to settle the soil around the roots.

Fertilization During Growing

They do not require fertilization other than a yearly addition of compost unless a soil test shows a deficiency in nutrients.

Cutting Guidelines

Years 1 & 2: Do not cut any blooms.  Dis-budding is recommended to encourage root growth and overall plant development.

Year 3: For 2/3 eye roots - Cut 1/3 of the total blooms; For 3/5 eye roots - Cut 50% of the blooms

Year 4: Cut 70% of the total blooms

More Details
Pre-Order
Peony lactiflora Karl Rosenfeld

Peony lactiflora 'Karl Rosenfeld'

Peony - Pre-Order for Fall 2024

Soil and Preparation

Peonies prefer well-draining, humus-rich moist soil. Amend heavy or very sandy soil with compost. Additionally, 1 cup of bonemeal can be used to amend the soil prior to planting. Choose a location in full sun, but one that provides ample growing room along with protection from strong winds.

Planting

Dig a a hole large enough to accommodate the roots and set the root so the eyes face upward. Fill in the hole, making sure to keep the peony's eyes/buds not deeper than 2" below the soil line. Water thoroughly to settle the soil around the roots.

Fertilization During Growing

They do not require fertilization other than a yearly addition of compost unless a soil test shows a deficiency in nutrients.

Cutting Guidelines

Years 1 & 2: Do not cut any blooms.  Dis-budding is recommended to encourage root growth and overall plant development.

Year 3: For 2/3 eye roots - Cut 1/3 of the total blooms; For 3/5 eye roots - Cut 50% of the blooms

Year 4: Cut 70% of the total blooms

More Details
Pre-Order
Peony lactiflora Krinkled White

Peony lactiflora 'Krinkled White'

Peony - Pre-Order for Fall 2024

Soil and Preparation

Peonies prefer well-draining, humus-rich moist soil. Amend heavy or very sandy soil with compost. Additionally, 1 cup of bonemeal can be used to amend the soil prior to planting. Choose a location in full sun, but one that provides ample growing room along with protection from strong winds.

Planting

Dig a a hole large enough to accommodate the roots and set the root so the eyes face upward. Fill in the hole, making sure to keep the peony's eyes/buds not deeper than 2" below the soil line. Water thoroughly to settle the soil around the roots.

Fertilization During Growing

They do not require fertilization other than a yearly addition of compost unless a soil test shows a deficiency in nutrients.

Cutting Guidelines

Years 1 & 2: Do not cut any blooms.  Dis-budding is recommended to encourage root growth and overall plant development.

Year 3: For 2/3 eye roots - Cut 1/3 of the total blooms; For 3/5 eye roots - Cut 50% of the blooms

Year 4: Cut 70% of the total blooms

More Details
Pre-Order
Peony lactiflora Mons. Jules Elie

Peony lactiflora 'Mons. Jules Elie'

Peony - Pre-Order for Fall 2024

Soil and Preparation

Peonies prefer well-draining, humus-rich moist soil. Amend heavy or very sandy soil with compost. Additionally, 1 cup of bonemeal can be used to amend the soil prior to planting. Choose a location in full sun, but one that provides ample growing room along with protection from strong winds.

Planting

Dig a a hole large enough to accommodate the roots and set the root so the eyes face upward. Fill in the hole, making sure to keep the peony's eyes/buds not deeper than 2" below the soil line. Water thoroughly to settle the soil around the roots.

Fertilization During Growing

They do not require fertilization other than a yearly addition of compost unless a soil test shows a deficiency in nutrients.

Cutting Guidelines

Years 1 & 2: Do not cut any blooms.  Dis-budding is recommended to encourage root growth and overall plant development.

Year 3: For 2/3 eye roots - Cut 1/3 of the total blooms; For 3/5 eye roots - Cut 50% of the blooms

Year 4: Cut 70% of the total blooms

More Details
Pre-Order
Peony lactiflora Pink Pompadour

Peony lactiflora 'Pink Pompadour'

Peony - Pre-Order for Fall 2024

Soil and Preparation

Peonies prefer well-draining, humus-rich moist soil. Amend heavy or very sandy soil with compost. Additionally, 1 cup of bonemeal can be used to amend the soil prior to planting. Choose a location in full sun, but one that provides ample growing room along with protection from strong winds.

Planting

Dig a a hole large enough to accommodate the roots and set the root so the eyes face upward. Fill in the hole, making sure to keep the peony's eyes/buds not deeper than 2" below the soil line. Water thoroughly to settle the soil around the roots.

Fertilization During Growing

They do not require fertilization other than a yearly addition of compost unless a soil test shows a deficiency in nutrients.

Cutting Guidelines

Years 1 & 2: Do not cut any blooms.  Dis-budding is recommended to encourage root growth and overall plant development.

Year 3: For 2/3 eye roots - Cut 1/3 of the total blooms; For 3/5 eye roots - Cut 50% of the blooms

Year 4: Cut 70% of the total blooms

More Details
Pre-Order
Peony lactiflora Red Charm

Peony lactiflora 'Red Charm'

Peony - Pre-Order for Fall 2024

Soil and Preparation

Peonies prefer well-draining, humus-rich moist soil. Amend heavy or very sandy soil with compost. Additionally, 1 cup of bonemeal can be used to amend the soil prior to planting. Choose a location in full sun, but one that provides ample growing room along with protection from strong winds.

Planting

Dig a a hole large enough to accommodate the roots and set the root so the eyes face upward. Fill in the hole, making sure to keep the peony's eyes/buds not deeper than 2" below the soil line. Water thoroughly to settle the soil around the roots.

Fertilization During Growing

They do not require fertilization other than a yearly addition of compost unless a soil test shows a deficiency in nutrients.

Cutting Guidelines

Years 1 & 2: Do not cut any blooms.  Dis-budding is recommended to encourage root growth and overall plant development.

Year 3: For 2/3 eye roots - Cut 1/3 of the total blooms; For 3/5 eye roots - Cut 50% of the blooms

Year 4: Cut 70% of the total blooms

More Details
Pre-Order
Peony lactiflora Red Magic

Peony lactiflora 'Red Magic'

Peony - Pre-Order for Fall 2024

Soil and Preparation

Peonies prefer well-draining, humus-rich moist soil. Amend heavy or very sandy soil with compost. Additionally, 1 cup of bonemeal can be used to amend the soil prior to planting. Choose a location in full sun, but one that provides ample growing room along with protection from strong winds.

Planting

Dig a a hole large enough to accommodate the roots and set the root so the eyes face upward. Fill in the hole, making sure to keep the peony's eyes/buds not deeper than 2" below the soil line. Water thoroughly to settle the soil around the roots.

Fertilization During Growing

They do not require fertilization other than a yearly addition of compost unless a soil test shows a deficiency in nutrients.

Cutting Guidelines

Years 1 & 2: Do not cut any blooms.  Dis-budding is recommended to encourage root growth and overall plant development.

Year 3: For 2/3 eye roots - Cut 1/3 of the total blooms; For 3/5 eye roots - Cut 50% of the blooms

Year 4: Cut 70% of the total blooms

More Details
Pre-Order
Peony lactiflora Sarah Bernhardt

Peony lactiflora 'Sarah Bernhardt'

Peony - Pre-Order for Fall 2024

Soil and Preparation

Peonies prefer well-draining, humus-rich moist soil. Amend heavy or very sandy soil with compost. Additionally, 1 cup of bonemeal can be used to amend the soil prior to planting. Choose a location in full sun, but one that provides ample growing room along with protection from strong winds.

Planting

Dig a a hole large enough to accommodate the roots and set the root so the eyes face upward. Fill in the hole, making sure to keep the peony's eyes/buds not deeper than 2" below the soil line. Water thoroughly to settle the soil around the roots.

Fertilization During Growing

They do not require fertilization other than a yearly addition of compost unless a soil test shows a deficiency in nutrients.

Cutting Guidelines

Years 1 & 2: Do not cut any blooms.  Dis-budding is recommended to encourage root growth and overall plant development.

Year 3: For 2/3 eye roots - Cut 1/3 of the total blooms; For 3/5 eye roots - Cut 50% of the blooms

Year 4: Cut 70% of the total blooms

More Details
Pre-Order
Peony lactiflora Shirley Temple

Peony lactiflora 'Shirley Temple'

Peony - Pre-Order for Fall 2024

Soil and Preparation

Peonies prefer well-draining, humus-rich moist soil. Amend heavy or very sandy soil with compost. Additionally, 1 cup of bonemeal can be used to amend the soil prior to planting. Choose a location in full sun, but one that provides ample growing room along with protection from strong winds.

Planting

Dig a a hole large enough to accommodate the roots and set the root so the eyes face upward. Fill in the hole, making sure to keep the peony's eyes/buds not deeper than 2" below the soil line. Water thoroughly to settle the soil around the roots.

Fertilization During Growing

They do not require fertilization other than a yearly addition of compost unless a soil test shows a deficiency in nutrients.

Cutting Guidelines

Years 1 & 2: Do not cut any blooms.  Dis-budding is recommended to encourage root growth and overall plant development.

Year 3: For 2/3 eye roots - Cut 1/3 of the total blooms; For 3/5 eye roots - Cut 50% of the blooms

Year 4: Cut 70% of the total blooms

More Details
Pre-Order
Peony lactiflora Sorbet

Peony lactiflora 'Sorbet'

Peony - Pre-Order for Fall 2024

Soil and Preparation

Peonies prefer well-draining, humus-rich moist soil. Amend heavy or very sandy soil with compost. Additionally, 1 cup of bonemeal can be used to amend the soil prior to planting. Choose a location in full sun, but one that provides ample growing room along with protection from strong winds.

Planting

Dig a a hole large enough to accommodate the roots and set the root so the eyes face upward. Fill in the hole, making sure to keep the peony's eyes/buds not deeper than 2" below the soil line. Water thoroughly to settle the soil around the roots.

Fertilization During Growing

They do not require fertilization other than a yearly addition of compost unless a soil test shows a deficiency in nutrients.

Cutting Guidelines

Years 1 & 2: Do not cut any blooms.  Dis-budding is recommended to encourage root growth and overall plant development.

Year 3: For 2/3 eye roots - Cut 1/3 of the total blooms; For 3/5 eye roots - Cut 50% of the blooms

Year 4: Cut 70% of the total blooms

More Details
Pre-Order
Ranunculus Brushmark Galthie

Ranunculus Brushmark 'Galthie'

LIMITED - Pre-Order for Fall 2024

Storage After Arrival

Unpack immediately upon arrival, ventilate if not immediately planted. Store at 58-65°F.


Pre-sprouting (preparation)

Pre-sprounting gives the bulbs a better and more even start for optimal rooting and flower development.

Soak the bags for 12 hours in water at a temperature of 70-80 degree F with 5 gr GA3 (Gibberellic Acid) per 100 liter maintain temp. of 70-80 degree F during this 12 hour period. Make sure that the whole bag is submerged in water for the whole period!

Dip the bulbs in a fungicide for about 15 minutes: 1% of Topsin (active ingredients: thiofanaat-methyand 500 g/l) + ½% Securo (active ingredients: pyraclostrobin 100 g/l + folpet 300 g/l).

Directly after soaking the bulbs for 12 hours and fungicide dip you need to plant bulbs directly in the ground, keep the soil moist. When direct planting is not possible, store the Ranunculus in a coldstore at 41 degrees F.

It is very important to make sure that bulbs do not dry out after planting. (When bulbs dry out you will have loss of germination of the bulbs).


Prior to planting:

Take a soil sample (before you start preparing the soil and bulbs).

Fertilizing depends on a soil and water sample / analysis.

PH: 5.8 – 6.3;

EC: 1.3 to 1.5.


Planting/Spacing

Plant in a moist and well-drained soil free from weeds, with a soil temperature below the 50 degrees F.

Plant approximately ½ to ¾ inch deep, spacing bulbs 6-8 inches apart within the rows and space each row 6-8 inches apart, max of 4 rows per bed.

Recommended to use 1 layer of nets for support.

Plant the bulbs with the center of the bulb facing up and the end of the roots down. Be careful of not damaging the bulbs when planting. Water bulbs after planting so the soil is moist and encloses around the bulbs.


Watering

In the beginning, utilize overhead watering. Later, water only by drip hoses.

Very important especially in the beginning of the crop to keep the soil moist at all times!


Fertilization

Until some years ago, only phosphate was known for a better root development. Now we know that the plants have a preferred order as it comes to the absorption of elements. In the first stage of growth they need sulfur, followed in order by boron, silicon, calcium, nitrogen, magnesium and last but not least phosphorus.

The availability of these elements – especially boron, silicon and calcium – are essential for a good start of the plants. If one of these elements is not (enough) available, the chain will be broken and the growing process might start slower or with more problems.

Apply your fertilizer according to your soil sample.

Approximately 1 week after planting, drench the soil with a ‘cocktail’ so the rooting is easier:

•              Risolex;

•              Topsin;

•              Proplant/previcure.


Growing

First 2-4 weeks you will see your Ranunculus sprouting in the ground, try to keep night temperatures around 15 degrees C at night and during day as cool as possible.

When plants have sprouted and are growing for about 4-5 weeks and you have sufficient foliage on the bulbs growing lower the night temperature to as cool as possible. (no frost) You get best quality Ranunculus when growing is as cool as possible, you can grow as cool as 2-4 degrees C. if possible keep sides open of greenhouse.

During night keep well enough ventilated to prevent mildew.

Grow Ranunculus as cool as possible.


Diseases and insects:

-          Botrytis and Mildew: spray with Flint, Ortiva or Switch (the only remedy that works curatively at low temperatures) and use leaf fertilizers + trace elements to make the leaves harder.

-          Leaf spot: spray preventive with Luna Privilege and use leaf fertilizers + trace elements to make the leaves harder. Because this disease is very contagious, it is important to spray preventive

-          Xanthomonas: gives round, purple-red spots, often with a yellow circle. Spray preventively with, for example, Serenade or Ranman Top. And use leaf fertilizers + trace elements to make the leaves harder.

-          Erwina: spray preventive with copper oxychloride.

-          Do regular spotting in the greenhouse to check for: Caterpillars, Aphids (Tepeki), Leaf Miners (Vertimec), Spider Mites, Thrips and Whiteflies. And spray when needed.


Flower harvest and treatment during harvest:

Do not pull the stems from the bulb always cut with knife!

Cool water buckets night before in cooler to have cold water in harvesting buckets.

When flowers are cut early in the morning, as soon as possible place them in water at a temperature of 40 degrees F (even before bunching) and store them in a cooler. If the crop is harvested later during the day and the stem dries in and will absorb less water, which is why it is important to place directly in water after cutting.


Cutting stage Ranunculus Romance:

Llet the flowers open and close for 3 days and then cut the flowers for maximum size. (this gives you larger flowers and longer vase life) .Harvest Ranunculus Romance flowers only early in the morning, cutting stem at ground level.

Add a Chlorine tablet of Florissant 520 into a bucket with water to be placed in the cooler.

More Details
Pre-Order
Ranunculus Crown Giverny

Ranunculus Crown 'Giverny'

LIMITED - Pre-Order for Fall 2024

Storage After Arrival

Unpack immediately upon arrival, ventilate if not immediately planted. Store at 58-65°F.


Pre-sprouting (preparation)

Pre-sprounting gives the bulbs a better and more even start for optimal rooting and flower development.

Soak the bags for 12 hours in water at a temperature of 70-80 degree F with 5 gr GA3 (Gibberellic Acid) per 100 liter maintain temp. of 70-80 degree F during this 12 hour period. Make sure that the whole bag is submerged in water for the whole period!

Dip the bulbs in a fungicide for about 15 minutes: 1% of Topsin (active ingredients: thiofanaat-methyand 500 g/l) + ½% Securo (active ingredients: pyraclostrobin 100 g/l + folpet 300 g/l).

Directly after soaking the bulbs for 12 hours and fungicide dip you need to plant bulbs directly in the ground, keep the soil moist. When direct planting is not possible, store the Ranunculus in a coldstore at 41 degrees F.

It is very important to make sure that bulbs do not dry out after planting. (When bulbs dry out you will have loss of germination of the bulbs).


Prior to planting:

Take a soil sample (before you start preparing the soil and bulbs).

Fertilizing depends on a soil and water sample / analysis.

PH: 5.8 – 6.3;

EC: 1.3 to 1.5.


Planting/Spacing

Plant in a moist and well-drained soil free from weeds, with a soil temperature below the 50 degrees F.

Plant approximately ½ to ¾ inch deep, spacing bulbs 6-8 inches apart within the rows and space each row 6-8 inches apart, max of 4 rows per bed.

Recommended to use 1 layer of nets for support.

Plant the bulbs with the center of the bulb facing up and the end of the roots down. Be careful of not damaging the bulbs when planting. Water bulbs after planting so the soil is moist and encloses around the bulbs.


Watering

In the beginning, utilize overhead watering. Later, water only by drip hoses.

Very important especially in the beginning of the crop to keep the soil moist at all times!


Fertilization

Until some years ago, only phosphate was known for a better root development. Now we know that the plants have a preferred order as it comes to the absorption of elements. In the first stage of growth they need sulfur, followed in order by boron, silicon, calcium, nitrogen, magnesium and last but not least phosphorus.

The availability of these elements – especially boron, silicon and calcium – are essential for a good start of the plants. If one of these elements is not (enough) available, the chain will be broken and the growing process might start slower or with more problems.

Apply your fertilizer according to your soil sample.

Approximately 1 week after planting, drench the soil with a ‘cocktail’ so the rooting is easier:

•              Risolex;

•              Topsin;

•              Proplant/previcure.


Growing

First 2-4 weeks you will see your Ranunculus sprouting in the ground, try to keep night temperatures around 15 degrees C at night and during day as cool as possible.

When plants have sprouted and are growing for about 4-5 weeks and you have sufficient foliage on the bulbs growing lower the night temperature to as cool as possible. (no frost) You get best quality Ranunculus when growing is as cool as possible, you can grow as cool as 2-4 degrees C. if possible keep sides open of greenhouse.

During night keep well enough ventilated to prevent mildew.

Grow Ranunculus as cool as possible.


Diseases and insects:

-          Botrytis and Mildew: spray with Flint, Ortiva or Switch (the only remedy that works curatively at low temperatures) and use leaf fertilizers + trace elements to make the leaves harder.

-          Leaf spot: spray preventive with Luna Privilege and use leaf fertilizers + trace elements to make the leaves harder. Because this disease is very contagious, it is important to spray preventive

-          Xanthomonas: gives round, purple-red spots, often with a yellow circle. Spray preventively with, for example, Serenade or Ranman Top. And use leaf fertilizers + trace elements to make the leaves harder.

-          Erwina: spray preventive with copper oxychloride.

-          Do regular spotting in the greenhouse to check for: Caterpillars, Aphids (Tepeki), Leaf Miners (Vertimec), Spider Mites, Thrips and Whiteflies. And spray when needed.


Flower harvest and treatment during harvest:

Do not pull the stems from the bulb always cut with knife!

Cool water buckets night before in cooler to have cold water in harvesting buckets.

When flowers are cut early in the morning, as soon as possible place them in water at a temperature of 40 degrees F (even before bunching) and store them in a cooler. If the crop is harvested later during the day and the stem dries in and will absorb less water, which is why it is important to place directly in water after cutting.


Cutting stage Ranunculus Romance:

Llet the flowers open and close for 3 days and then cut the flowers for maximum size. (this gives you larger flowers and longer vase life) .Harvest Ranunculus Romance flowers only early in the morning, cutting stem at ground level.

Add a Chlorine tablet of Florissant 520 into a bucket with water to be placed in the cooler.

More Details
Pre-Order
Ranunculus Poodle Ramila

Ranunculus Poodle 'Ramila'

LIMITED - Pre-Order for Fall 2024

Storage After Arrival

Unpack immediately upon arrival, ventilate if not immediately planted. Store at 58-65°F.


Pre-sprouting (preparation)

Pre-sprounting gives the bulbs a better and more even start for optimal rooting and flower development.

Soak the bags for 12 hours in water at a temperature of 70-80 degree F with 5 gr GA3 (Gibberellic Acid) per 100 liter maintain temp. of 70-80 degree F during this 12 hour period. Make sure that the whole bag is submerged in water for the whole period!

Dip the bulbs in a fungicide for about 15 minutes: 1% of Topsin (active ingredients: thiofanaat-methyand 500 g/l) + ½% Securo (active ingredients: pyraclostrobin 100 g/l + folpet 300 g/l).

Directly after soaking the bulbs for 12 hours and fungicide dip you need to plant bulbs directly in the ground, keep the soil moist. When direct planting is not possible, store the Ranunculus in a coldstore at 41 degrees F.

It is very important to make sure that bulbs do not dry out after planting. (When bulbs dry out you will have loss of germination of the bulbs).


Prior to planting:

Take a soil sample (before you start preparing the soil and bulbs).

Fertilizing depends on a soil and water sample / analysis.

PH: 5.8 – 6.3;

EC: 1.3 to 1.5.


Planting/Spacing

Plant in a moist and well-drained soil free from weeds, with a soil temperature below the 50 degrees F.

Plant approximately ½ to ¾ inch deep, spacing bulbs 6-8 inches apart within the rows and space each row 6-8 inches apart, max of 4 rows per bed.

Recommended to use 1 layer of nets for support.

Plant the bulbs with the center of the bulb facing up and the end of the roots down. Be careful of not damaging the bulbs when planting. Water bulbs after planting so the soil is moist and encloses around the bulbs.


Watering

In the beginning, utilize overhead watering. Later, water only by drip hoses.

Very important especially in the beginning of the crop to keep the soil moist at all times!


Fertilization

Until some years ago, only phosphate was known for a better root development. Now we know that the plants have a preferred order as it comes to the absorption of elements. In the first stage of growth they need sulfur, followed in order by boron, silicon, calcium, nitrogen, magnesium and last but not least phosphorus.

The availability of these elements – especially boron, silicon and calcium – are essential for a good start of the plants. If one of these elements is not (enough) available, the chain will be broken and the growing process might start slower or with more problems.

Apply your fertilizer according to your soil sample.

Approximately 1 week after planting, drench the soil with a ‘cocktail’ so the rooting is easier:

•              Risolex;

•              Topsin;

•              Proplant/previcure.


Growing

First 2-4 weeks you will see your Ranunculus sprouting in the ground, try to keep night temperatures around 15 degrees C at night and during day as cool as possible.

When plants have sprouted and are growing for about 4-5 weeks and you have sufficient foliage on the bulbs growing lower the night temperature to as cool as possible. (no frost) You get best quality Ranunculus when growing is as cool as possible, you can grow as cool as 2-4 degrees C. if possible keep sides open of greenhouse.

During night keep well enough ventilated to prevent mildew.

Grow Ranunculus as cool as possible.


Diseases and insects:

-          Botrytis and Mildew: spray with Flint, Ortiva or Switch (the only remedy that works curatively at low temperatures) and use leaf fertilizers + trace elements to make the leaves harder.

-          Leaf spot: spray preventive with Luna Privilege and use leaf fertilizers + trace elements to make the leaves harder. Because this disease is very contagious, it is important to spray preventive

-          Xanthomonas: gives round, purple-red spots, often with a yellow circle. Spray preventively with, for example, Serenade or Ranman Top. And use leaf fertilizers + trace elements to make the leaves harder.

-          Erwina: spray preventive with copper oxychloride.

-          Do regular spotting in the greenhouse to check for: Caterpillars, Aphids (Tepeki), Leaf Miners (Vertimec), Spider Mites, Thrips and Whiteflies. And spray when needed.


Flower harvest and treatment during harvest:

Do not pull the stems from the bulb always cut with knife!

Cool water buckets night before in cooler to have cold water in harvesting buckets.

When flowers are cut early in the morning, as soon as possible place them in water at a temperature of 40 degrees F (even before bunching) and store them in a cooler. If the crop is harvested later during the day and the stem dries in and will absorb less water, which is why it is important to place directly in water after cutting.


Cutting stage Ranunculus Romance:

Llet the flowers open and close for 3 days and then cut the flowers for maximum size. (this gives you larger flowers and longer vase life) .Harvest Ranunculus Romance flowers only early in the morning, cutting stem at ground level.

Add a Chlorine tablet of Florissant 520 into a bucket with water to be placed in the cooler.

More Details
Pre-Order
Ranunculus Romance Courchevel

Ranunculus Romance 'Courchevel'

Pre-Order for Fall 2024

Storage After Arrival

Unpack immediately upon arrival, ventilate if not immediately planted. Store at 58-65°F.


Pre-sprouting (preparation)

Pre-sprounting gives the bulbs a better and more even start for optimal rooting and flower development.

Soak the bags for 12 hours in water at a temperature of 70-80 degree F with 5 gr GA3 (Gibberellic Acid) per 100 liter maintain temp. of 70-80 degree F during this 12 hour period. Make sure that the whole bag is submerged in water for the whole period!

Dip the bulbs in a fungicide for about 15 minutes: 1% of Topsin (active ingredients: thiofanaat-methyand 500 g/l) + ½% Securo (active ingredients: pyraclostrobin 100 g/l + folpet 300 g/l).

Directly after soaking the bulbs for 12 hours and fungicide dip you need to plant bulbs directly in the ground, keep the soil moist. When direct planting is not possible, store the Ranunculus in a coldstore at 41 degrees F.

It is very important to make sure that bulbs do not dry out after planting. (When bulbs dry out you will have loss of germination of the bulbs).


Prior to planting:

Take a soil sample (before you start preparing the soil and bulbs).

Fertilizing depends on a soil and water sample / analysis.

PH: 5.8 – 6.3;

EC: 1.3 to 1.5.


Planting/Spacing

Plant in a moist and well-drained soil free from weeds, with a soil temperature below the 50 degrees F.

Plant approximately ½ to ¾ inch deep, spacing bulbs 6-8 inches apart within the rows and space each row 6-8 inches apart, max of 4 rows per bed.

Recommended to use 1 layer of nets for support.

Plant the bulbs with the center of the bulb facing up and the end of the roots down. Be careful of not damaging the bulbs when planting. Water bulbs after planting so the soil is moist and encloses around the bulbs.


Watering

In the beginning, utilize overhead watering. Later, water only by drip hoses.

Very important especially in the beginning of the crop to keep the soil moist at all times!


Fertilization

Until some years ago, only phosphate was known for a better root development. Now we know that the plants have a preferred order as it comes to the absorption of elements. In the first stage of growth they need sulfur, followed in order by boron, silicon, calcium, nitrogen, magnesium and last but not least phosphorus.

The availability of these elements – especially boron, silicon and calcium – are essential for a good start of the plants. If one of these elements is not (enough) available, the chain will be broken and the growing process might start slower or with more problems.

Apply your fertilizer according to your soil sample.

Approximately 1 week after planting, drench the soil with a ‘cocktail’ so the rooting is easier:

•              Risolex;

•              Topsin;

•              Proplant/previcure.


Growing

First 2-4 weeks you will see your Ranunculus sprouting in the ground, try to keep night temperatures around 15 degrees C at night and during day as cool as possible.

When plants have sprouted and are growing for about 4-5 weeks and you have sufficient foliage on the bulbs growing lower the night temperature to as cool as possible. (no frost) You get best quality Ranunculus when growing is as cool as possible, you can grow as cool as 2-4 degrees C. if possible keep sides open of greenhouse.

During night keep well enough ventilated to prevent mildew.

Grow Ranunculus as cool as possible.


Diseases and insects:

-          Botrytis and Mildew: spray with Flint, Ortiva or Switch (the only remedy that works curatively at low temperatures) and use leaf fertilizers + trace elements to make the leaves harder.

-          Leaf spot: spray preventive with Luna Privilege and use leaf fertilizers + trace elements to make the leaves harder. Because this disease is very contagious, it is important to spray preventive

-          Xanthomonas: gives round, purple-red spots, often with a yellow circle. Spray preventively with, for example, Serenade or Ranman Top. And use leaf fertilizers + trace elements to make the leaves harder.

-          Erwina: spray preventive with copper oxychloride.

-          Do regular spotting in the greenhouse to check for: Caterpillars, Aphids (Tepeki), Leaf Miners (Vertimec), Spider Mites, Thrips and Whiteflies. And spray when needed.


Flower harvest and treatment during harvest:

Do not pull the stems from the bulb always cut with knife!

Cool water buckets night before in cooler to have cold water in harvesting buckets.

When flowers are cut early in the morning, as soon as possible place them in water at a temperature of 40 degrees F (even before bunching) and store them in a cooler. If the crop is harvested later during the day and the stem dries in and will absorb less water, which is why it is important to place directly in water after cutting.


Cutting stage Ranunculus Romance:

Llet the flowers open and close for 3 days and then cut the flowers for maximum size. (this gives you larger flowers and longer vase life) .Harvest Ranunculus Romance flowers only early in the morning, cutting stem at ground level.

Add a Chlorine tablet of Florissant 520 into a bucket with water to be placed in the cooler.

More Details
Pre-Order
Ranunculus Romance Get Lucky

Ranunculus Romance 'Get Lucky'

Pre-Order for Fall 2024

Storage After Arrival

Unpack immediately upon arrival, ventilate if not immediately planted. Store at 58-65°F.


Pre-sprouting (preparation)

Pre-sprounting gives the bulbs a better and more even start for optimal rooting and flower development.

Soak the bags for 12 hours in water at a temperature of 70-80 degree F with 5 gr GA3 (Gibberellic Acid) per 100 liter maintain temp. of 70-80 degree F during this 12 hour period. Make sure that the whole bag is submerged in water for the whole period!

Dip the bulbs in a fungicide for about 15 minutes: 1% of Topsin (active ingredients: thiofanaat-methyand 500 g/l) + ½% Securo (active ingredients: pyraclostrobin 100 g/l + folpet 300 g/l).

Directly after soaking the bulbs for 12 hours and fungicide dip you need to plant bulbs directly in the ground, keep the soil moist. When direct planting is not possible, store the Ranunculus in a coldstore at 41 degrees F.

It is very important to make sure that bulbs do not dry out after planting. (When bulbs dry out you will have loss of germination of the bulbs).


Prior to planting:

Take a soil sample (before you start preparing the soil and bulbs).

Fertilizing depends on a soil and water sample / analysis.

PH: 5.8 – 6.3;

EC: 1.3 to 1.5.


Planting/Spacing

Plant in a moist and well-drained soil free from weeds, with a soil temperature below the 50 degrees F.

Plant approximately ½ to ¾ inch deep, spacing bulbs 6-8 inches apart within the rows and space each row 6-8 inches apart, max of 4 rows per bed.

Recommended to use 1 layer of nets for support.

Plant the bulbs with the center of the bulb facing up and the end of the roots down. Be careful of not damaging the bulbs when planting. Water bulbs after planting so the soil is moist and encloses around the bulbs.


Watering

In the beginning, utilize overhead watering. Later, water only by drip hoses.

Very important especially in the beginning of the crop to keep the soil moist at all times!


Fertilization

Until some years ago, only phosphate was known for a better root development. Now we know that the plants have a preferred order as it comes to the absorption of elements. In the first stage of growth they need sulfur, followed in order by boron, silicon, calcium, nitrogen, magnesium and last but not least phosphorus.

The availability of these elements – especially boron, silicon and calcium – are essential for a good start of the plants. If one of these elements is not (enough) available, the chain will be broken and the growing process might start slower or with more problems.

Apply your fertilizer according to your soil sample.

Approximately 1 week after planting, drench the soil with a ‘cocktail’ so the rooting is easier:

•              Risolex;

•              Topsin;

•              Proplant/previcure.


Growing

First 2-4 weeks you will see your Ranunculus sprouting in the ground, try to keep night temperatures around 15 degrees C at night and during day as cool as possible.

When plants have sprouted and are growing for about 4-5 weeks and you have sufficient foliage on the bulbs growing lower the night temperature to as cool as possible. (no frost) You get best quality Ranunculus when growing is as cool as possible, you can grow as cool as 2-4 degrees C. if possible keep sides open of greenhouse.

During night keep well enough ventilated to prevent mildew.

Grow Ranunculus as cool as possible.


Diseases and insects:

-          Botrytis and Mildew: spray with Flint, Ortiva or Switch (the only remedy that works curatively at low temperatures) and use leaf fertilizers + trace elements to make the leaves harder.

-          Leaf spot: spray preventive with Luna Privilege and use leaf fertilizers + trace elements to make the leaves harder. Because this disease is very contagious, it is important to spray preventive

-          Xanthomonas: gives round, purple-red spots, often with a yellow circle. Spray preventively with, for example, Serenade or Ranman Top. And use leaf fertilizers + trace elements to make the leaves harder.

-          Erwina: spray preventive with copper oxychloride.

-          Do regular spotting in the greenhouse to check for: Caterpillars, Aphids (Tepeki), Leaf Miners (Vertimec), Spider Mites, Thrips and Whiteflies. And spray when needed.


Flower harvest and treatment during harvest:

Do not pull the stems from the bulb always cut with knife!

Cool water buckets night before in cooler to have cold water in harvesting buckets.

When flowers are cut early in the morning, as soon as possible place them in water at a temperature of 40 degrees F (even before bunching) and store them in a cooler. If the crop is harvested later during the day and the stem dries in and will absorb less water, which is why it is important to place directly in water after cutting.


Cutting stage Ranunculus Romance:

Llet the flowers open and close for 3 days and then cut the flowers for maximum size. (this gives you larger flowers and longer vase life) .Harvest Ranunculus Romance flowers only early in the morning, cutting stem at ground level.

Add a Chlorine tablet of Florissant 520 into a bucket with water to be placed in the cooler.

More Details
Pre-Order
Ranunculus Romance Hydra

Ranunculus Romance 'Hydra'

Pre-Order for Fall 2024

Storage After Arrival

Unpack immediately upon arrival, ventilate if not immediately planted. Store at 58-65°F.


Pre-sprouting (preparation)

Pre-sprounting gives the bulbs a better and more even start for optimal rooting and flower development.

Soak the bags for 12 hours in water at a temperature of 70-80 degree F with 5 gr GA3 (Gibberellic Acid) per 100 liter maintain temp. of 70-80 degree F during this 12 hour period. Make sure that the whole bag is submerged in water for the whole period!

Dip the bulbs in a fungicide for about 15 minutes: 1% of Topsin (active ingredients: thiofanaat-methyand 500 g/l) + ½% Securo (active ingredients: pyraclostrobin 100 g/l + folpet 300 g/l).

Directly after soaking the bulbs for 12 hours and fungicide dip you need to plant bulbs directly in the ground, keep the soil moist. When direct planting is not possible, store the Ranunculus in a coldstore at 41 degrees F.

It is very important to make sure that bulbs do not dry out after planting. (When bulbs dry out you will have loss of germination of the bulbs).


Prior to planting:

Take a soil sample (before you start preparing the soil and bulbs).

Fertilizing depends on a soil and water sample / analysis.

PH: 5.8 – 6.3;

EC: 1.3 to 1.5.


Planting/Spacing

Plant in a moist and well-drained soil free from weeds, with a soil temperature below the 50 degrees F.

Plant approximately ½ to ¾ inch deep, spacing bulbs 6-8 inches apart within the rows and space each row 6-8 inches apart, max of 4 rows per bed.

Recommended to use 1 layer of nets for support.

Plant the bulbs with the center of the bulb facing up and the end of the roots down. Be careful of not damaging the bulbs when planting. Water bulbs after planting so the soil is moist and encloses around the bulbs.


Watering

In the beginning, utilize overhead watering. Later, water only by drip hoses.

Very important especially in the beginning of the crop to keep the soil moist at all times!


Fertilization

Until some years ago, only phosphate was known for a better root development. Now we know that the plants have a preferred order as it comes to the absorption of elements. In the first stage of growth they need sulfur, followed in order by boron, silicon, calcium, nitrogen, magnesium and last but not least phosphorus.

The availability of these elements – especially boron, silicon and calcium – are essential for a good start of the plants. If one of these elements is not (enough) available, the chain will be broken and the growing process might start slower or with more problems.

Apply your fertilizer according to your soil sample.

Approximately 1 week after planting, drench the soil with a ‘cocktail’ so the rooting is easier:

•              Risolex;

•              Topsin;

•              Proplant/previcure.


Growing

First 2-4 weeks you will see your Ranunculus sprouting in the ground, try to keep night temperatures around 15 degrees C at night and during day as cool as possible.

When plants have sprouted and are growing for about 4-5 weeks and you have sufficient foliage on the bulbs growing lower the night temperature to as cool as possible. (no frost) You get best quality Ranunculus when growing is as cool as possible, you can grow as cool as 2-4 degrees C. if possible keep sides open of greenhouse.

During night keep well enough ventilated to prevent mildew.

Grow Ranunculus as cool as possible.


Diseases and insects:

-          Botrytis and Mildew: spray with Flint, Ortiva or Switch (the only remedy that works curatively at low temperatures) and use leaf fertilizers + trace elements to make the leaves harder.

-          Leaf spot: spray preventive with Luna Privilege and use leaf fertilizers + trace elements to make the leaves harder. Because this disease is very contagious, it is important to spray preventive

-          Xanthomonas: gives round, purple-red spots, often with a yellow circle. Spray preventively with, for example, Serenade or Ranman Top. And use leaf fertilizers + trace elements to make the leaves harder.

-          Erwina: spray preventive with copper oxychloride.

-          Do regular spotting in the greenhouse to check for: Caterpillars, Aphids (Tepeki), Leaf Miners (Vertimec), Spider Mites, Thrips and Whiteflies. And spray when needed.


Flower harvest and treatment during harvest:

Do not pull the stems from the bulb always cut with knife!

Cool water buckets night before in cooler to have cold water in harvesting buckets.

When flowers are cut early in the morning, as soon as possible place them in water at a temperature of 40 degrees F (even before bunching) and store them in a cooler. If the crop is harvested later during the day and the stem dries in and will absorb less water, which is why it is important to place directly in water after cutting.


Cutting stage Ranunculus Romance:

Llet the flowers open and close for 3 days and then cut the flowers for maximum size. (this gives you larger flowers and longer vase life) .Harvest Ranunculus Romance flowers only early in the morning, cutting stem at ground level.

Add a Chlorine tablet of Florissant 520 into a bucket with water to be placed in the cooler.

More Details
Pre-Order
Ranunculus Romance Loubeyres

Ranunculus Romance 'Loubeyres'

Pre-Order for Fall 2024

Storage After Arrival

Unpack immediately upon arrival, ventilate if not immediately planted. Store at 58-65°F.


Pre-sprouting (preparation)

Pre-sprounting gives the bulbs a better and more even start for optimal rooting and flower development.

Soak the bags for 12 hours in water at a temperature of 70-80 degree F with 5 gr GA3 (Gibberellic Acid) per 100 liter maintain temp. of 70-80 degree F during this 12 hour period. Make sure that the whole bag is submerged in water for the whole period!

Dip the bulbs in a fungicide for about 15 minutes: 1% of Topsin (active ingredients: thiofanaat-methyand 500 g/l) + ½% Securo (active ingredients: pyraclostrobin 100 g/l + folpet 300 g/l).

Directly after soaking the bulbs for 12 hours and fungicide dip you need to plant bulbs directly in the ground, keep the soil moist. When direct planting is not possible, store the Ranunculus in a coldstore at 41 degrees F.

It is very important to make sure that bulbs do not dry out after planting. (When bulbs dry out you will have loss of germination of the bulbs).


Prior to planting:

Take a soil sample (before you start preparing the soil and bulbs).

Fertilizing depends on a soil and water sample / analysis.

PH: 5.8 – 6.3;

EC: 1.3 to 1.5.


Planting/Spacing

Plant in a moist and well-drained soil free from weeds, with a soil temperature below the 50 degrees F.

Plant approximately ½ to ¾ inch deep, spacing bulbs 6-8 inches apart within the rows and space each row 6-8 inches apart, max of 4 rows per bed.

Recommended to use 1 layer of nets for support.

Plant the bulbs with the center of the bulb facing up and the end of the roots down. Be careful of not damaging the bulbs when planting. Water bulbs after planting so the soil is moist and encloses around the bulbs.


Watering

In the beginning, utilize overhead watering. Later, water only by drip hoses.

Very important especially in the beginning of the crop to keep the soil moist at all times!


Fertilization

Until some years ago, only phosphate was known for a better root development. Now we know that the plants have a preferred order as it comes to the absorption of elements. In the first stage of growth they need sulfur, followed in order by boron, silicon, calcium, nitrogen, magnesium and last but not least phosphorus.

The availability of these elements – especially boron, silicon and calcium – are essential for a good start of the plants. If one of these elements is not (enough) available, the chain will be broken and the growing process might start slower or with more problems.

Apply your fertilizer according to your soil sample.

Approximately 1 week after planting, drench the soil with a ‘cocktail’ so the rooting is easier:

•              Risolex;

•              Topsin;

•              Proplant/previcure.


Growing

First 2-4 weeks you will see your Ranunculus sprouting in the ground, try to keep night temperatures around 15 degrees C at night and during day as cool as possible.

When plants have sprouted and are growing for about 4-5 weeks and you have sufficient foliage on the bulbs growing lower the night temperature to as cool as possible. (no frost) You get best quality Ranunculus when growing is as cool as possible, you can grow as cool as 2-4 degrees C. if possible keep sides open of greenhouse.

During night keep well enough ventilated to prevent mildew.

Grow Ranunculus as cool as possible.


Diseases and insects:

-          Botrytis and Mildew: spray with Flint, Ortiva or Switch (the only remedy that works curatively at low temperatures) and use leaf fertilizers + trace elements to make the leaves harder.

-          Leaf spot: spray preventive with Luna Privilege and use leaf fertilizers + trace elements to make the leaves harder. Because this disease is very contagious, it is important to spray preventive

-          Xanthomonas: gives round, purple-red spots, often with a yellow circle. Spray preventively with, for example, Serenade or Ranman Top. And use leaf fertilizers + trace elements to make the leaves harder.

-          Erwina: spray preventive with copper oxychloride.

-          Do regular spotting in the greenhouse to check for: Caterpillars, Aphids (Tepeki), Leaf Miners (Vertimec), Spider Mites, Thrips and Whiteflies. And spray when needed.


Flower harvest and treatment during harvest:

Do not pull the stems from the bulb always cut with knife!

Cool water buckets night before in cooler to have cold water in harvesting buckets.

When flowers are cut early in the morning, as soon as possible place them in water at a temperature of 40 degrees F (even before bunching) and store them in a cooler. If the crop is harvested later during the day and the stem dries in and will absorb less water, which is why it is important to place directly in water after cutting.


Cutting stage Ranunculus Romance:

Llet the flowers open and close for 3 days and then cut the flowers for maximum size. (this gives you larger flowers and longer vase life) .Harvest Ranunculus Romance flowers only early in the morning, cutting stem at ground level.

Add a Chlorine tablet of Florissant 520 into a bucket with water to be placed in the cooler.

More Details
Pre-Order
Ranunculus Romance Maritime

Ranunculus Romance 'Maritime'

Pre-Order for Fall 2024

Storage After Arrival

Unpack immediately upon arrival, ventilate if not immediately planted. Store at 58-65°F.


Pre-sprouting (preparation)

Pre-sprounting gives the bulbs a better and more even start for optimal rooting and flower development.

Soak the bags for 12 hours in water at a temperature of 70-80 degree F with 5 gr GA3 (Gibberellic Acid) per 100 liter maintain temp. of 70-80 degree F during this 12 hour period. Make sure that the whole bag is submerged in water for the whole period!

Dip the bulbs in a fungicide for about 15 minutes: 1% of Topsin (active ingredients: thiofanaat-methyand 500 g/l) + ½% Securo (active ingredients: pyraclostrobin 100 g/l + folpet 300 g/l).

Directly after soaking the bulbs for 12 hours and fungicide dip you need to plant bulbs directly in the ground, keep the soil moist. When direct planting is not possible, store the Ranunculus in a coldstore at 41 degrees F.

It is very important to make sure that bulbs do not dry out after planting. (When bulbs dry out you will have loss of germination of the bulbs).


Prior to planting:

Take a soil sample (before you start preparing the soil and bulbs).

Fertilizing depends on a soil and water sample / analysis.

PH: 5.8 – 6.3;

EC: 1.3 to 1.5.


Planting/Spacing

Plant in a moist and well-drained soil free from weeds, with a soil temperature below the 50 degrees F.

Plant approximately ½ to ¾ inch deep, spacing bulbs 6-8 inches apart within the rows and space each row 6-8 inches apart, max of 4 rows per bed.

Recommended to use 1 layer of nets for support.

Plant the bulbs with the center of the bulb facing up and the end of the roots down. Be careful of not damaging the bulbs when planting. Water bulbs after planting so the soil is moist and encloses around the bulbs.


Watering

In the beginning, utilize overhead watering. Later, water only by drip hoses.

Very important especially in the beginning of the crop to keep the soil moist at all times!


Fertilization

Until some years ago, only phosphate was known for a better root development. Now we know that the plants have a preferred order as it comes to the absorption of elements. In the first stage of growth they need sulfur, followed in order by boron, silicon, calcium, nitrogen, magnesium and last but not least phosphorus.

The availability of these elements – especially boron, silicon and calcium – are essential for a good start of the plants. If one of these elements is not (enough) available, the chain will be broken and the growing process might start slower or with more problems.

Apply your fertilizer according to your soil sample.

Approximately 1 week after planting, drench the soil with a ‘cocktail’ so the rooting is easier:

•              Risolex;

•              Topsin;

•              Proplant/previcure.


Growing

First 2-4 weeks you will see your Ranunculus sprouting in the ground, try to keep night temperatures around 15 degrees C at night and during day as cool as possible.

When plants have sprouted and are growing for about 4-5 weeks and you have sufficient foliage on the bulbs growing lower the night temperature to as cool as possible. (no frost) You get best quality Ranunculus when growing is as cool as possible, you can grow as cool as 2-4 degrees C. if possible keep sides open of greenhouse.

During night keep well enough ventilated to prevent mildew.

Grow Ranunculus as cool as possible.


Diseases and insects:

-          Botrytis and Mildew: spray with Flint, Ortiva or Switch (the only remedy that works curatively at low temperatures) and use leaf fertilizers + trace elements to make the leaves harder.

-          Leaf spot: spray preventive with Luna Privilege and use leaf fertilizers + trace elements to make the leaves harder. Because this disease is very contagious, it is important to spray preventive

-          Xanthomonas: gives round, purple-red spots, often with a yellow circle. Spray preventively with, for example, Serenade or Ranman Top. And use leaf fertilizers + trace elements to make the leaves harder.

-          Erwina: spray preventive with copper oxychloride.

-          Do regular spotting in the greenhouse to check for: Caterpillars, Aphids (Tepeki), Leaf Miners (Vertimec), Spider Mites, Thrips and Whiteflies. And spray when needed.


Flower harvest and treatment during harvest:

Do not pull the stems from the bulb always cut with knife!

Cool water buckets night before in cooler to have cold water in harvesting buckets.

When flowers are cut early in the morning, as soon as possible place them in water at a temperature of 40 degrees F (even before bunching) and store them in a cooler. If the crop is harvested later during the day and the stem dries in and will absorb less water, which is why it is important to place directly in water after cutting.


Cutting stage Ranunculus Romance:

Llet the flowers open and close for 3 days and then cut the flowers for maximum size. (this gives you larger flowers and longer vase life) .Harvest Ranunculus Romance flowers only early in the morning, cutting stem at ground level.

Add a Chlorine tablet of Florissant 520 into a bucket with water to be placed in the cooler.

More Details
Pre-Order
Ranunculus Romance Nohant

Ranunculus Romance 'Nohant'

Pre-Order for Fall 2024

Storage After Arrival

Unpack immediately upon arrival, ventilate if not immediately planted. Store at 58-65°F.


Pre-sprouting (preparation)

Pre-sprounting gives the bulbs a better and more even start for optimal rooting and flower development.

Soak the bags for 12 hours in water at a temperature of 70-80 degree F with 5 gr GA3 (Gibberellic Acid) per 100 liter maintain temp. of 70-80 degree F during this 12 hour period. Make sure that the whole bag is submerged in water for the whole period!

Dip the bulbs in a fungicide for about 15 minutes: 1% of Topsin (active ingredients: thiofanaat-methyand 500 g/l) + ½% Securo (active ingredients: pyraclostrobin 100 g/l + folpet 300 g/l).

Directly after soaking the bulbs for 12 hours and fungicide dip you need to plant bulbs directly in the ground, keep the soil moist. When direct planting is not possible, store the Ranunculus in a coldstore at 41 degrees F.

It is very important to make sure that bulbs do not dry out after planting. (When bulbs dry out you will have loss of germination of the bulbs).


Prior to planting:

Take a soil sample (before you start preparing the soil and bulbs).

Fertilizing depends on a soil and water sample / analysis.

PH: 5.8 – 6.3;

EC: 1.3 to 1.5.


Planting/Spacing

Plant in a moist and well-drained soil free from weeds, with a soil temperature below the 50 degrees F.

Plant approximately ½ to ¾ inch deep, spacing bulbs 6-8 inches apart within the rows and space each row 6-8 inches apart, max of 4 rows per bed.

Recommended to use 1 layer of nets for support.

Plant the bulbs with the center of the bulb facing up and the end of the roots down. Be careful of not damaging the bulbs when planting. Water bulbs after planting so the soil is moist and encloses around the bulbs.


Watering

In the beginning, utilize overhead watering. Later, water only by drip hoses.

Very important especially in the beginning of the crop to keep the soil moist at all times!


Fertilization

Until some years ago, only phosphate was known for a better root development. Now we know that the plants have a preferred order as it comes to the absorption of elements. In the first stage of growth they need sulfur, followed in order by boron, silicon, calcium, nitrogen, magnesium and last but not least phosphorus.

The availability of these elements – especially boron, silicon and calcium – are essential for a good start of the plants. If one of these elements is not (enough) available, the chain will be broken and the growing process might start slower or with more problems.

Apply your fertilizer according to your soil sample.

Approximately 1 week after planting, drench the soil with a ‘cocktail’ so the rooting is easier:

•              Risolex;

•              Topsin;

•              Proplant/previcure.


Growing

First 2-4 weeks you will see your Ranunculus sprouting in the ground, try to keep night temperatures around 15 degrees C at night and during day as cool as possible.

When plants have sprouted and are growing for about 4-5 weeks and you have sufficient foliage on the bulbs growing lower the night temperature to as cool as possible. (no frost) You get best quality Ranunculus when growing is as cool as possible, you can grow as cool as 2-4 degrees C. if possible keep sides open of greenhouse.

During night keep well enough ventilated to prevent mildew.

Grow Ranunculus as cool as possible.


Diseases and insects:

-          Botrytis and Mildew: spray with Flint, Ortiva or Switch (the only remedy that works curatively at low temperatures) and use leaf fertilizers + trace elements to make the leaves harder.

-          Leaf spot: spray preventive with Luna Privilege and use leaf fertilizers + trace elements to make the leaves harder. Because this disease is very contagious, it is important to spray preventive

-          Xanthomonas: gives round, purple-red spots, often with a yellow circle. Spray preventively with, for example, Serenade or Ranman Top. And use leaf fertilizers + trace elements to make the leaves harder.

-          Erwina: spray preventive with copper oxychloride.

-          Do regular spotting in the greenhouse to check for: Caterpillars, Aphids (Tepeki), Leaf Miners (Vertimec), Spider Mites, Thrips and Whiteflies. And spray when needed.


Flower harvest and treatment during harvest:

Do not pull the stems from the bulb always cut with knife!

Cool water buckets night before in cooler to have cold water in harvesting buckets.

When flowers are cut early in the morning, as soon as possible place them in water at a temperature of 40 degrees F (even before bunching) and store them in a cooler. If the crop is harvested later during the day and the stem dries in and will absorb less water, which is why it is important to place directly in water after cutting.


Cutting stage Ranunculus Romance:

Llet the flowers open and close for 3 days and then cut the flowers for maximum size. (this gives you larger flowers and longer vase life) .Harvest Ranunculus Romance flowers only early in the morning, cutting stem at ground level.

Add a Chlorine tablet of Florissant 520 into a bucket with water to be placed in the cooler.

More Details
Pre-Order
Ranunculus Romance Odon

Ranunculus Romance 'Odon'

Pre-Order for Fall 2024

Storage After Arrival

Unpack immediately upon arrival, ventilate if not immediately planted. Store at 58-65°F.


Pre-sprouting (preparation)

Pre-sprounting gives the bulbs a better and more even start for optimal rooting and flower development.

Soak the bags for 12 hours in water at a temperature of 70-80 degree F with 5 gr GA3 (Gibberellic Acid) per 100 liter maintain temp. of 70-80 degree F during this 12 hour period. Make sure that the whole bag is submerged in water for the whole period!

Dip the bulbs in a fungicide for about 15 minutes: 1% of Topsin (active ingredients: thiofanaat-methyand 500 g/l) + ½% Securo (active ingredients: pyraclostrobin 100 g/l + folpet 300 g/l).

Directly after soaking the bulbs for 12 hours and fungicide dip you need to plant bulbs directly in the ground, keep the soil moist. When direct planting is not possible, store the Ranunculus in a coldstore at 41 degrees F.

It is very important to make sure that bulbs do not dry out after planting. (When bulbs dry out you will have loss of germination of the bulbs).


Prior to planting:

Take a soil sample (before you start preparing the soil and bulbs).

Fertilizing depends on a soil and water sample / analysis.

PH: 5.8 – 6.3;

EC: 1.3 to 1.5.


Planting/Spacing

Plant in a moist and well-drained soil free from weeds, with a soil temperature below the 50 degrees F.

Plant approximately ½ to ¾ inch deep, spacing bulbs 6-8 inches apart within the rows and space each row 6-8 inches apart, max of 4 rows per bed.

Recommended to use 1 layer of nets for support.

Plant the bulbs with the center of the bulb facing up and the end of the roots down. Be careful of not damaging the bulbs when planting. Water bulbs after planting so the soil is moist and encloses around the bulbs.


Watering

In the beginning, utilize overhead watering. Later, water only by drip hoses.

Very important especially in the beginning of the crop to keep the soil moist at all times!


Fertilization

Until some years ago, only phosphate was known for a better root development. Now we know that the plants have a preferred order as it comes to the absorption of elements. In the first stage of growth they need sulfur, followed in order by boron, silicon, calcium, nitrogen, magnesium and last but not least phosphorus.

The availability of these elements – especially boron, silicon and calcium – are essential for a good start of the plants. If one of these elements is not (enough) available, the chain will be broken and the growing process might start slower or with more problems.

Apply your fertilizer according to your soil sample.

Approximately 1 week after planting, drench the soil with a ‘cocktail’ so the rooting is easier:

•              Risolex;

•              Topsin;

•              Proplant/previcure.


Growing

First 2-4 weeks you will see your Ranunculus sprouting in the ground, try to keep night temperatures around 15 degrees C at night and during day as cool as possible.

When plants have sprouted and are growing for about 4-5 weeks and you have sufficient foliage on the bulbs growing lower the night temperature to as cool as possible. (no frost) You get best quality Ranunculus when growing is as cool as possible, you can grow as cool as 2-4 degrees C. if possible keep sides open of greenhouse.

During night keep well enough ventilated to prevent mildew.

Grow Ranunculus as cool as possible.


Diseases and insects:

-          Botrytis and Mildew: spray with Flint, Ortiva or Switch (the only remedy that works curatively at low temperatures) and use leaf fertilizers + trace elements to make the leaves harder.

-          Leaf spot: spray preventive with Luna Privilege and use leaf fertilizers + trace elements to make the leaves harder. Because this disease is very contagious, it is important to spray preventive

-          Xanthomonas: gives round, purple-red spots, often with a yellow circle. Spray preventively with, for example, Serenade or Ranman Top. And use leaf fertilizers + trace elements to make the leaves harder.

-          Erwina: spray preventive with copper oxychloride.

-          Do regular spotting in the greenhouse to check for: Caterpillars, Aphids (Tepeki), Leaf Miners (Vertimec), Spider Mites, Thrips and Whiteflies. And spray when needed.


Flower harvest and treatment during harvest:

Do not pull the stems from the bulb always cut with knife!

Cool water buckets night before in cooler to have cold water in harvesting buckets.

When flowers are cut early in the morning, as soon as possible place them in water at a temperature of 40 degrees F (even before bunching) and store them in a cooler. If the crop is harvested later during the day and the stem dries in and will absorb less water, which is why it is important to place directly in water after cutting.


Cutting stage Ranunculus Romance:

Llet the flowers open and close for 3 days and then cut the flowers for maximum size. (this gives you larger flowers and longer vase life) .Harvest Ranunculus Romance flowers only early in the morning, cutting stem at ground level.

Add a Chlorine tablet of Florissant 520 into a bucket with water to be placed in the cooler.

More Details
Pre-Order
Ranunculus Romance Paradou

Ranunculus Romance 'Paradou'

Pre-Order for Fall 2024

Storage After Arrival

Unpack immediately upon arrival, ventilate if not immediately planted. Store at 58-65°F.


Pre-sprouting (preparation)

Pre-sprounting gives the bulbs a better and more even start for optimal rooting and flower development.

Soak the bags for 12 hours in water at a temperature of 70-80 degree F with 5 gr GA3 (Gibberellic Acid) per 100 liter maintain temp. of 70-80 degree F during this 12 hour period. Make sure that the whole bag is submerged in water for the whole period!

Dip the bulbs in a fungicide for about 15 minutes: 1% of Topsin (active ingredients: thiofanaat-methyand 500 g/l) + ½% Securo (active ingredients: pyraclostrobin 100 g/l + folpet 300 g/l).

Directly after soaking the bulbs for 12 hours and fungicide dip you need to plant bulbs directly in the ground, keep the soil moist. When direct planting is not possible, store the Ranunculus in a coldstore at 41 degrees F.

It is very important to make sure that bulbs do not dry out after planting. (When bulbs dry out you will have loss of germination of the bulbs).


Prior to planting:

Take a soil sample (before you start preparing the soil and bulbs).

Fertilizing depends on a soil and water sample / analysis.

PH: 5.8 – 6.3;

EC: 1.3 to 1.5.


Planting/Spacing

Plant in a moist and well-drained soil free from weeds, with a soil temperature below the 50 degrees F.

Plant approximately ½ to ¾ inch deep, spacing bulbs 6-8 inches apart within the rows and space each row 6-8 inches apart, max of 4 rows per bed.

Recommended to use 1 layer of nets for support.

Plant the bulbs with the center of the bulb facing up and the end of the roots down. Be careful of not damaging the bulbs when planting. Water bulbs after planting so the soil is moist and encloses around the bulbs.


Watering

In the beginning, utilize overhead watering. Later, water only by drip hoses.

Very important especially in the beginning of the crop to keep the soil moist at all times!


Fertilization

Until some years ago, only phosphate was known for a better root development. Now we know that the plants have a preferred order as it comes to the absorption of elements. In the first stage of growth they need sulfur, followed in order by boron, silicon, calcium, nitrogen, magnesium and last but not least phosphorus.

The availability of these elements – especially boron, silicon and calcium – are essential for a good start of the plants. If one of these elements is not (enough) available, the chain will be broken and the growing process might start slower or with more problems.

Apply your fertilizer according to your soil sample.

Approximately 1 week after planting, drench the soil with a ‘cocktail’ so the rooting is easier:

•              Risolex;

•              Topsin;

•              Proplant/previcure.


Growing

First 2-4 weeks you will see your Ranunculus sprouting in the ground, try to keep night temperatures around 15 degrees C at night and during day as cool as possible.

When plants have sprouted and are growing for about 4-5 weeks and you have sufficient foliage on the bulbs growing lower the night temperature to as cool as possible. (no frost) You get best quality Ranunculus when growing is as cool as possible, you can grow as cool as 2-4 degrees C. if possible keep sides open of greenhouse.

During night keep well enough ventilated to prevent mildew.

Grow Ranunculus as cool as possible.


Diseases and insects:

-          Botrytis and Mildew: spray with Flint, Ortiva or Switch (the only remedy that works curatively at low temperatures) and use leaf fertilizers + trace elements to make the leaves harder.

-          Leaf spot: spray preventive with Luna Privilege and use leaf fertilizers + trace elements to make the leaves harder. Because this disease is very contagious, it is important to spray preventive

-          Xanthomonas: gives round, purple-red spots, often with a yellow circle. Spray preventively with, for example, Serenade or Ranman Top. And use leaf fertilizers + trace elements to make the leaves harder.

-          Erwina: spray preventive with copper oxychloride.

-          Do regular spotting in the greenhouse to check for: Caterpillars, Aphids (Tepeki), Leaf Miners (Vertimec), Spider Mites, Thrips and Whiteflies. And spray when needed.


Flower harvest and treatment during harvest:

Do not pull the stems from the bulb always cut with knife!

Cool water buckets night before in cooler to have cold water in harvesting buckets.

When flowers are cut early in the morning, as soon as possible place them in water at a temperature of 40 degrees F (even before bunching) and store them in a cooler. If the crop is harvested later during the day and the stem dries in and will absorb less water, which is why it is important to place directly in water after cutting.


Cutting stage Ranunculus Romance:

Llet the flowers open and close for 3 days and then cut the flowers for maximum size. (this gives you larger flowers and longer vase life) .Harvest Ranunculus Romance flowers only early in the morning, cutting stem at ground level.

Add a Chlorine tablet of Florissant 520 into a bucket with water to be placed in the cooler.

More Details
Pre-Order
Ranunculus Romance Perigord

Ranunculus Romance 'Perigord'

Pre-Order for Fall 2024

Storage After Arrival

Unpack immediately upon arrival, ventilate if not immediately planted. Store at 58-65°F.


Pre-sprouting (preparation)

Pre-sprounting gives the bulbs a better and more even start for optimal rooting and flower development.

Soak the bags for 12 hours in water at a temperature of 70-80 degree F with 5 gr GA3 (Gibberellic Acid) per 100 liter maintain temp. of 70-80 degree F during this 12 hour period. Make sure that the whole bag is submerged in water for the whole period!

Dip the bulbs in a fungicide for about 15 minutes: 1% of Topsin (active ingredients: thiofanaat-methyand 500 g/l) + ½% Securo (active ingredients: pyraclostrobin 100 g/l + folpet 300 g/l).

Directly after soaking the bulbs for 12 hours and fungicide dip you need to plant bulbs directly in the ground, keep the soil moist. When direct planting is not possible, store the Ranunculus in a coldstore at 41 degrees F.

It is very important to make sure that bulbs do not dry out after planting. (When bulbs dry out you will have loss of germination of the bulbs).


Prior to planting:

Take a soil sample (before you start preparing the soil and bulbs).

Fertilizing depends on a soil and water sample / analysis.

PH: 5.8 – 6.3;

EC: 1.3 to 1.5.


Planting/Spacing

Plant in a moist and well-drained soil free from weeds, with a soil temperature below the 50 degrees F.

Plant approximately ½ to ¾ inch deep, spacing bulbs 6-8 inches apart within the rows and space each row 6-8 inches apart, max of 4 rows per bed.

Recommended to use 1 layer of nets for support.

Plant the bulbs with the center of the bulb facing up and the end of the roots down. Be careful of not damaging the bulbs when planting. Water bulbs after planting so the soil is moist and encloses around the bulbs.


Watering

In the beginning, utilize overhead watering. Later, water only by drip hoses.

Very important especially in the beginning of the crop to keep the soil moist at all times!


Fertilization

Until some years ago, only phosphate was known for a better root development. Now we know that the plants have a preferred order as it comes to the absorption of elements. In the first stage of growth they need sulfur, followed in order by boron, silicon, calcium, nitrogen, magnesium and last but not least phosphorus.

The availability of these elements – especially boron, silicon and calcium – are essential for a good start of the plants. If one of these elements is not (enough) available, the chain will be broken and the growing process might start slower or with more problems.

Apply your fertilizer according to your soil sample.

Approximately 1 week after planting, drench the soil with a ‘cocktail’ so the rooting is easier:

•              Risolex;

•              Topsin;

•              Proplant/previcure.


Growing

First 2-4 weeks you will see your Ranunculus sprouting in the ground, try to keep night temperatures around 15 degrees C at night and during day as cool as possible.

When plants have sprouted and are growing for about 4-5 weeks and you have sufficient foliage on the bulbs growing lower the night temperature to as cool as possible. (no frost) You get best quality Ranunculus when growing is as cool as possible, you can grow as cool as 2-4 degrees C. if possible keep sides open of greenhouse.

During night keep well enough ventilated to prevent mildew.

Grow Ranunculus as cool as possible.


Diseases and insects:

-          Botrytis and Mildew: spray with Flint, Ortiva or Switch (the only remedy that works curatively at low temperatures) and use leaf fertilizers + trace elements to make the leaves harder.

-          Leaf spot: spray preventive with Luna Privilege and use leaf fertilizers + trace elements to make the leaves harder. Because this disease is very contagious, it is important to spray preventive

-          Xanthomonas: gives round, purple-red spots, often with a yellow circle. Spray preventively with, for example, Serenade or Ranman Top. And use leaf fertilizers + trace elements to make the leaves harder.

-          Erwina: spray preventive with copper oxychloride.

-          Do regular spotting in the greenhouse to check for: Caterpillars, Aphids (Tepeki), Leaf Miners (Vertimec), Spider Mites, Thrips and Whiteflies. And spray when needed.


Flower harvest and treatment during harvest:

Do not pull the stems from the bulb always cut with knife!

Cool water buckets night before in cooler to have cold water in harvesting buckets.

When flowers are cut early in the morning, as soon as possible place them in water at a temperature of 40 degrees F (even before bunching) and store them in a cooler. If the crop is harvested later during the day and the stem dries in and will absorb less water, which is why it is important to place directly in water after cutting.


Cutting stage Ranunculus Romance:

Llet the flowers open and close for 3 days and then cut the flowers for maximum size. (this gives you larger flowers and longer vase life) .Harvest Ranunculus Romance flowers only early in the morning, cutting stem at ground level.

Add a Chlorine tablet of Florissant 520 into a bucket with water to be placed in the cooler.

More Details
Pre-Order
Ranunculus Romance Plage

Ranunculus Romance 'Plage'

LIMITED - Pre-Order for Fall 2024

Storage After Arrival

Unpack immediately upon arrival, ventilate if not immediately planted. Store at 58-65°F.


Pre-sprouting (preparation)

Pre-sprounting gives the bulbs a better and more even start for optimal rooting and flower development.

Soak the bags for 12 hours in water at a temperature of 70-80 degree F with 5 gr GA3 (Gibberellic Acid) per 100 liter maintain temp. of 70-80 degree F during this 12 hour period. Make sure that the whole bag is submerged in water for the whole period!

Dip the bulbs in a fungicide for about 15 minutes: 1% of Topsin (active ingredients: thiofanaat-methyand 500 g/l) + ½% Securo (active ingredients: pyraclostrobin 100 g/l + folpet 300 g/l).

Directly after soaking the bulbs for 12 hours and fungicide dip you need to plant bulbs directly in the ground, keep the soil moist. When direct planting is not possible, store the Ranunculus in a coldstore at 41 degrees F.

It is very important to make sure that bulbs do not dry out after planting. (When bulbs dry out you will have loss of germination of the bulbs).


Prior to planting:

Take a soil sample (before you start preparing the soil and bulbs).

Fertilizing depends on a soil and water sample / analysis.

PH: 5.8 – 6.3;

EC: 1.3 to 1.5.


Planting/Spacing

Plant in a moist and well-drained soil free from weeds, with a soil temperature below the 50 degrees F.

Plant approximately ½ to ¾ inch deep, spacing bulbs 6-8 inches apart within the rows and space each row 6-8 inches apart, max of 4 rows per bed.

Recommended to use 1 layer of nets for support.

Plant the bulbs with the center of the bulb facing up and the end of the roots down. Be careful of not damaging the bulbs when planting. Water bulbs after planting so the soil is moist and encloses around the bulbs.


Watering

In the beginning, utilize overhead watering. Later, water only by drip hoses.

Very important especially in the beginning of the crop to keep the soil moist at all times!


Fertilization

Until some years ago, only phosphate was known for a better root development. Now we know that the plants have a preferred order as it comes to the absorption of elements. In the first stage of growth they need sulfur, followed in order by boron, silicon, calcium, nitrogen, magnesium and last but not least phosphorus.

The availability of these elements – especially boron, silicon and calcium – are essential for a good start of the plants. If one of these elements is not (enough) available, the chain will be broken and the growing process might start slower or with more problems.

Apply your fertilizer according to your soil sample.

Approximately 1 week after planting, drench the soil with a ‘cocktail’ so the rooting is easier:

•              Risolex;

•              Topsin;

•              Proplant/previcure.


Growing

First 2-4 weeks you will see your Ranunculus sprouting in the ground, try to keep night temperatures around 15 degrees C at night and during day as cool as possible.

When plants have sprouted and are growing for about 4-5 weeks and you have sufficient foliage on the bulbs growing lower the night temperature to as cool as possible. (no frost) You get best quality Ranunculus when growing is as cool as possible, you can grow as cool as 2-4 degrees C. if possible keep sides open of greenhouse.

During night keep well enough ventilated to prevent mildew.

Grow Ranunculus as cool as possible.


Diseases and insects:

-          Botrytis and Mildew: spray with Flint, Ortiva or Switch (the only remedy that works curatively at low temperatures) and use leaf fertilizers + trace elements to make the leaves harder.

-          Leaf spot: spray preventive with Luna Privilege and use leaf fertilizers + trace elements to make the leaves harder. Because this disease is very contagious, it is important to spray preventive

-          Xanthomonas: gives round, purple-red spots, often with a yellow circle. Spray preventively with, for example, Serenade or Ranman Top. And use leaf fertilizers + trace elements to make the leaves harder.

-          Erwina: spray preventive with copper oxychloride.

-          Do regular spotting in the greenhouse to check for: Caterpillars, Aphids (Tepeki), Leaf Miners (Vertimec), Spider Mites, Thrips and Whiteflies. And spray when needed.


Flower harvest and treatment during harvest:

Do not pull the stems from the bulb always cut with knife!

Cool water buckets night before in cooler to have cold water in harvesting buckets.

When flowers are cut early in the morning, as soon as possible place them in water at a temperature of 40 degrees F (even before bunching) and store them in a cooler. If the crop is harvested later during the day and the stem dries in and will absorb less water, which is why it is important to place directly in water after cutting.


Cutting stage Ranunculus Romance:

Llet the flowers open and close for 3 days and then cut the flowers for maximum size. (this gives you larger flowers and longer vase life) .Harvest Ranunculus Romance flowers only early in the morning, cutting stem at ground level.

Add a Chlorine tablet of Florissant 520 into a bucket with water to be placed in the cooler.

More Details
Pre-Order
Ranunculus Romance Quimper

Ranunculus Romance 'Quimper'

Pre-Order for Fall 2024

Storage After Arrival

Unpack immediately upon arrival, ventilate if not immediately planted. Store at 58-65°F.


Pre-sprouting (preparation)

Pre-sprounting gives the bulbs a better and more even start for optimal rooting and flower development.

Soak the bags for 12 hours in water at a temperature of 70-80 degree F with 5 gr GA3 (Gibberellic Acid) per 100 liter maintain temp. of 70-80 degree F during this 12 hour period. Make sure that the whole bag is submerged in water for the whole period!

Dip the bulbs in a fungicide for about 15 minutes: 1% of Topsin (active ingredients: thiofanaat-methyand 500 g/l) + ½% Securo (active ingredients: pyraclostrobin 100 g/l + folpet 300 g/l).

Directly after soaking the bulbs for 12 hours and fungicide dip you need to plant bulbs directly in the ground, keep the soil moist. When direct planting is not possible, store the Ranunculus in a coldstore at 41 degrees F.

It is very important to make sure that bulbs do not dry out after planting. (When bulbs dry out you will have loss of germination of the bulbs).


Prior to planting:

Take a soil sample (before you start preparing the soil and bulbs).

Fertilizing depends on a soil and water sample / analysis.

PH: 5.8 – 6.3;

EC: 1.3 to 1.5.


Planting/Spacing

Plant in a moist and well-drained soil free from weeds, with a soil temperature below the 50 degrees F.

Plant approximately ½ to ¾ inch deep, spacing bulbs 6-8 inches apart within the rows and space each row 6-8 inches apart, max of 4 rows per bed.

Recommended to use 1 layer of nets for support.

Plant the bulbs with the center of the bulb facing up and the end of the roots down. Be careful of not damaging the bulbs when planting. Water bulbs after planting so the soil is moist and encloses around the bulbs.


Watering

In the beginning, utilize overhead watering. Later, water only by drip hoses.

Very important especially in the beginning of the crop to keep the soil moist at all times!


Fertilization

Until some years ago, only phosphate was known for a better root development. Now we know that the plants have a preferred order as it comes to the absorption of elements. In the first stage of growth they need sulfur, followed in order by boron, silicon, calcium, nitrogen, magnesium and last but not least phosphorus.

The availability of these elements – especially boron, silicon and calcium – are essential for a good start of the plants. If one of these elements is not (enough) available, the chain will be broken and the growing process might start slower or with more problems.

Apply your fertilizer according to your soil sample.

Approximately 1 week after planting, drench the soil with a ‘cocktail’ so the rooting is easier:

•              Risolex;

•              Topsin;

•              Proplant/previcure.


Growing

First 2-4 weeks you will see your Ranunculus sprouting in the ground, try to keep night temperatures around 15 degrees C at night and during day as cool as possible.

When plants have sprouted and are growing for about 4-5 weeks and you have sufficient foliage on the bulbs growing lower the night temperature to as cool as possible. (no frost) You get best quality Ranunculus when growing is as cool as possible, you can grow as cool as 2-4 degrees C. if possible keep sides open of greenhouse.

During night keep well enough ventilated to prevent mildew.

Grow Ranunculus as cool as possible.


Diseases and insects:

-          Botrytis and Mildew: spray with Flint, Ortiva or Switch (the only remedy that works curatively at low temperatures) and use leaf fertilizers + trace elements to make the leaves harder.

-          Leaf spot: spray preventive with Luna Privilege and use leaf fertilizers + trace elements to make the leaves harder. Because this disease is very contagious, it is important to spray preventive

-          Xanthomonas: gives round, purple-red spots, often with a yellow circle. Spray preventively with, for example, Serenade or Ranman Top. And use leaf fertilizers + trace elements to make the leaves harder.

-          Erwina: spray preventive with copper oxychloride.

-          Do regular spotting in the greenhouse to check for: Caterpillars, Aphids (Tepeki), Leaf Miners (Vertimec), Spider Mites, Thrips and Whiteflies. And spray when needed.


Flower harvest and treatment during harvest:

Do not pull the stems from the bulb always cut with knife!

Cool water buckets night before in cooler to have cold water in harvesting buckets.

When flowers are cut early in the morning, as soon as possible place them in water at a temperature of 40 degrees F (even before bunching) and store them in a cooler. If the crop is harvested later during the day and the stem dries in and will absorb less water, which is why it is important to place directly in water after cutting.


Cutting stage Ranunculus Romance:

Llet the flowers open and close for 3 days and then cut the flowers for maximum size. (this gives you larger flowers and longer vase life) .Harvest Ranunculus Romance flowers only early in the morning, cutting stem at ground level.

Add a Chlorine tablet of Florissant 520 into a bucket with water to be placed in the cooler.

More Details
Pre-Order
Ranunculus Romance Rosy Cheeks

Ranunculus Romance 'Rosy Cheeks'

Pre-Order for Fall 2024

Storage After Arrival

Unpack immediately upon arrival, ventilate if not immediately planted. Store at 58-65°F.


Pre-sprouting (preparation)

Pre-sprounting gives the bulbs a better and more even start for optimal rooting and flower development.

Soak the bags for 12 hours in water at a temperature of 70-80 degree F with 5 gr GA3 (Gibberellic Acid) per 100 liter maintain temp. of 70-80 degree F during this 12 hour period. Make sure that the whole bag is submerged in water for the whole period!

Dip the bulbs in a fungicide for about 15 minutes: 1% of Topsin (active ingredients: thiofanaat-methyand 500 g/l) + ½% Securo (active ingredients: pyraclostrobin 100 g/l + folpet 300 g/l).

Directly after soaking the bulbs for 12 hours and fungicide dip you need to plant bulbs directly in the ground, keep the soil moist. When direct planting is not possible, store the Ranunculus in a coldstore at 41 degrees F.

It is very important to make sure that bulbs do not dry out after planting. (When bulbs dry out you will have loss of germination of the bulbs).


Prior to planting:

Take a soil sample (before you start preparing the soil and bulbs).

Fertilizing depends on a soil and water sample / analysis.

PH: 5.8 – 6.3;

EC: 1.3 to 1.5.


Planting/Spacing

Plant in a moist and well-drained soil free from weeds, with a soil temperature below the 50 degrees F.

Plant approximately ½ to ¾ inch deep, spacing bulbs 6-8 inches apart within the rows and space each row 6-8 inches apart, max of 4 rows per bed.

Recommended to use 1 layer of nets for support.

Plant the bulbs with the center of the bulb facing up and the end of the roots down. Be careful of not damaging the bulbs when planting. Water bulbs after planting so the soil is moist and encloses around the bulbs.


Watering

In the beginning, utilize overhead watering. Later, water only by drip hoses.

Very important especially in the beginning of the crop to keep the soil moist at all times!


Fertilization

Until some years ago, only phosphate was known for a better root development. Now we know that the plants have a preferred order as it comes to the absorption of elements. In the first stage of growth they need sulfur, followed in order by boron, silicon, calcium, nitrogen, magnesium and last but not least phosphorus.

The availability of these elements – especially boron, silicon and calcium – are essential for a good start of the plants. If one of these elements is not (enough) available, the chain will be broken and the growing process might start slower or with more problems.

Apply your fertilizer according to your soil sample.

Approximately 1 week after planting, drench the soil with a ‘cocktail’ so the rooting is easier:

•              Risolex;

•              Topsin;

•              Proplant/previcure.


Growing

First 2-4 weeks you will see your Ranunculus sprouting in the ground, try to keep night temperatures around 15 degrees C at night and during day as cool as possible.

When plants have sprouted and are growing for about 4-5 weeks and you have sufficient foliage on the bulbs growing lower the night temperature to as cool as possible. (no frost) You get best quality Ranunculus when growing is as cool as possible, you can grow as cool as 2-4 degrees C. if possible keep sides open of greenhouse.

During night keep well enough ventilated to prevent mildew.

Grow Ranunculus as cool as possible.


Diseases and insects:

-          Botrytis and Mildew: spray with Flint, Ortiva or Switch (the only remedy that works curatively at low temperatures) and use leaf fertilizers + trace elements to make the leaves harder.

-          Leaf spot: spray preventive with Luna Privilege and use leaf fertilizers + trace elements to make the leaves harder. Because this disease is very contagious, it is important to spray preventive

-          Xanthomonas: gives round, purple-red spots, often with a yellow circle. Spray preventively with, for example, Serenade or Ranman Top. And use leaf fertilizers + trace elements to make the leaves harder.

-          Erwina: spray preventive with copper oxychloride.

-          Do regular spotting in the greenhouse to check for: Caterpillars, Aphids (Tepeki), Leaf Miners (Vertimec), Spider Mites, Thrips and Whiteflies. And spray when needed.


Flower harvest and treatment during harvest:

Do not pull the stems from the bulb always cut with knife!

Cool water buckets night before in cooler to have cold water in harvesting buckets.

When flowers are cut early in the morning, as soon as possible place them in water at a temperature of 40 degrees F (even before bunching) and store them in a cooler. If the crop is harvested later during the day and the stem dries in and will absorb less water, which is why it is important to place directly in water after cutting.


Cutting stage Ranunculus Romance:

Llet the flowers open and close for 3 days and then cut the flowers for maximum size. (this gives you larger flowers and longer vase life) .Harvest Ranunculus Romance flowers only early in the morning, cutting stem at ground level.

Add a Chlorine tablet of Florissant 520 into a bucket with water to be placed in the cooler.

More Details
Pre-Order
Ranunculus Romance Salerno

Ranunculus Romance 'Salerno'

Pre-Order for Fall 2024

Storage After Arrival

Unpack immediately upon arrival, ventilate if not immediately planted. Store at 58-65°F.


Pre-sprouting (preparation)

Pre-sprounting gives the bulbs a better and more even start for optimal rooting and flower development.

Soak the bags for 12 hours in water at a temperature of 70-80 degree F with 5 gr GA3 (Gibberellic Acid) per 100 liter maintain temp. of 70-80 degree F during this 12 hour period. Make sure that the whole bag is submerged in water for the whole period!

Dip the bulbs in a fungicide for about 15 minutes: 1% of Topsin (active ingredients: thiofanaat-methyand 500 g/l) + ½% Securo (active ingredients: pyraclostrobin 100 g/l + folpet 300 g/l).

Directly after soaking the bulbs for 12 hours and fungicide dip you need to plant bulbs directly in the ground, keep the soil moist. When direct planting is not possible, store the Ranunculus in a coldstore at 41 degrees F.

It is very important to make sure that bulbs do not dry out after planting. (When bulbs dry out you will have loss of germination of the bulbs).


Prior to planting:

Take a soil sample (before you start preparing the soil and bulbs).

Fertilizing depends on a soil and water sample / analysis.

PH: 5.8 – 6.3;

EC: 1.3 to 1.5.


Planting/Spacing

Plant in a moist and well-drained soil free from weeds, with a soil temperature below the 50 degrees F.

Plant approximately ½ to ¾ inch deep, spacing bulbs 6-8 inches apart within the rows and space each row 6-8 inches apart, max of 4 rows per bed.

Recommended to use 1 layer of nets for support.

Plant the bulbs with the center of the bulb facing up and the end of the roots down. Be careful of not damaging the bulbs when planting. Water bulbs after planting so the soil is moist and encloses around the bulbs.


Watering

In the beginning, utilize overhead watering. Later, water only by drip hoses.

Very important especially in the beginning of the crop to keep the soil moist at all times!


Fertilization

Until some years ago, only phosphate was known for a better root development. Now we know that the plants have a preferred order as it comes to the absorption of elements. In the first stage of growth they need sulfur, followed in order by boron, silicon, calcium, nitrogen, magnesium and last but not least phosphorus.

The availability of these elements – especially boron, silicon and calcium – are essential for a good start of the plants. If one of these elements is not (enough) available, the chain will be broken and the growing process might start slower or with more problems.

Apply your fertilizer according to your soil sample.

Approximately 1 week after planting, drench the soil with a ‘cocktail’ so the rooting is easier:

•              Risolex;

•              Topsin;

•              Proplant/previcure.


Growing

First 2-4 weeks you will see your Ranunculus sprouting in the ground, try to keep night temperatures around 15 degrees C at night and during day as cool as possible.

When plants have sprouted and are growing for about 4-5 weeks and you have sufficient foliage on the bulbs growing lower the night temperature to as cool as possible. (no frost) You get best quality Ranunculus when growing is as cool as possible, you can grow as cool as 2-4 degrees C. if possible keep sides open of greenhouse.

During night keep well enough ventilated to prevent mildew.

Grow Ranunculus as cool as possible.


Diseases and insects:

-          Botrytis and Mildew: spray with Flint, Ortiva or Switch (the only remedy that works curatively at low temperatures) and use leaf fertilizers + trace elements to make the leaves harder.

-          Leaf spot: spray preventive with Luna Privilege and use leaf fertilizers + trace elements to make the leaves harder. Because this disease is very contagious, it is important to spray preventive

-          Xanthomonas: gives round, purple-red spots, often with a yellow circle. Spray preventively with, for example, Serenade or Ranman Top. And use leaf fertilizers + trace elements to make the leaves harder.

-          Erwina: spray preventive with copper oxychloride.

-          Do regular spotting in the greenhouse to check for: Caterpillars, Aphids (Tepeki), Leaf Miners (Vertimec), Spider Mites, Thrips and Whiteflies. And spray when needed.


Flower harvest and treatment during harvest:

Do not pull the stems from the bulb always cut with knife!

Cool water buckets night before in cooler to have cold water in harvesting buckets.

When flowers are cut early in the morning, as soon as possible place them in water at a temperature of 40 degrees F (even before bunching) and store them in a cooler. If the crop is harvested later during the day and the stem dries in and will absorb less water, which is why it is important to place directly in water after cutting.


Cutting stage Ranunculus Romance:

Llet the flowers open and close for 3 days and then cut the flowers for maximum size. (this gives you larger flowers and longer vase life) .Harvest Ranunculus Romance flowers only early in the morning, cutting stem at ground level.

Add a Chlorine tablet of Florissant 520 into a bucket with water to be placed in the cooler.

More Details
Pre-Order
Ranunculus Romance Seine

Ranunculus Romance 'Seine'

Pre-Order for Fall 2024

Storage After Arrival

Unpack immediately upon arrival, ventilate if not immediately planted. Store at 58-65°F.


Pre-sprouting (preparation)

Pre-sprounting gives the bulbs a better and more even start for optimal rooting and flower development.

Soak the bags for 12 hours in water at a temperature of 70-80 degree F with 5 gr GA3 (Gibberellic Acid) per 100 liter maintain temp. of 70-80 degree F during this 12 hour period. Make sure that the whole bag is submerged in water for the whole period!

Dip the bulbs in a fungicide for about 15 minutes: 1% of Topsin (active ingredients: thiofanaat-methyand 500 g/l) + ½% Securo (active ingredients: pyraclostrobin 100 g/l + folpet 300 g/l).

Directly after soaking the bulbs for 12 hours and fungicide dip you need to plant bulbs directly in the ground, keep the soil moist. When direct planting is not possible, store the Ranunculus in a coldstore at 41 degrees F.

It is very important to make sure that bulbs do not dry out after planting. (When bulbs dry out you will have loss of germination of the bulbs).


Prior to planting:

Take a soil sample (before you start preparing the soil and bulbs).

Fertilizing depends on a soil and water sample / analysis.

PH: 5.8 – 6.3;

EC: 1.3 to 1.5.


Planting/Spacing

Plant in a moist and well-drained soil free from weeds, with a soil temperature below the 50 degrees F.

Plant approximately ½ to ¾ inch deep, spacing bulbs 6-8 inches apart within the rows and space each row 6-8 inches apart, max of 4 rows per bed.

Recommended to use 1 layer of nets for support.

Plant the bulbs with the center of the bulb facing up and the end of the roots down. Be careful of not damaging the bulbs when planting. Water bulbs after planting so the soil is moist and encloses around the bulbs.


Watering

In the beginning, utilize overhead watering. Later, water only by drip hoses.

Very important especially in the beginning of the crop to keep the soil moist at all times!


Fertilization

Until some years ago, only phosphate was known for a better root development. Now we know that the plants have a preferred order as it comes to the absorption of elements. In the first stage of growth they need sulfur, followed in order by boron, silicon, calcium, nitrogen, magnesium and last but not least phosphorus.

The availability of these elements – especially boron, silicon and calcium – are essential for a good start of the plants. If one of these elements is not (enough) available, the chain will be broken and the growing process might start slower or with more problems.

Apply your fertilizer according to your soil sample.

Approximately 1 week after planting, drench the soil with a ‘cocktail’ so the rooting is easier:

•              Risolex;

•              Topsin;

•              Proplant/previcure.


Growing

First 2-4 weeks you will see your Ranunculus sprouting in the ground, try to keep night temperatures around 15 degrees C at night and during day as cool as possible.

When plants have sprouted and are growing for about 4-5 weeks and you have sufficient foliage on the bulbs growing lower the night temperature to as cool as possible. (no frost) You get best quality Ranunculus when growing is as cool as possible, you can grow as cool as 2-4 degrees C. if possible keep sides open of greenhouse.

During night keep well enough ventilated to prevent mildew.

Grow Ranunculus as cool as possible.


Diseases and insects:

-          Botrytis and Mildew: spray with Flint, Ortiva or Switch (the only remedy that works curatively at low temperatures) and use leaf fertilizers + trace elements to make the leaves harder.

-          Leaf spot: spray preventive with Luna Privilege and use leaf fertilizers + trace elements to make the leaves harder. Because this disease is very contagious, it is important to spray preventive

-          Xanthomonas: gives round, purple-red spots, often with a yellow circle. Spray preventively with, for example, Serenade or Ranman Top. And use leaf fertilizers + trace elements to make the leaves harder.

-          Erwina: spray preventive with copper oxychloride.

-          Do regular spotting in the greenhouse to check for: Caterpillars, Aphids (Tepeki), Leaf Miners (Vertimec), Spider Mites, Thrips and Whiteflies. And spray when needed.


Flower harvest and treatment during harvest:

Do not pull the stems from the bulb always cut with knife!

Cool water buckets night before in cooler to have cold water in harvesting buckets.

When flowers are cut early in the morning, as soon as possible place them in water at a temperature of 40 degrees F (even before bunching) and store them in a cooler. If the crop is harvested later during the day and the stem dries in and will absorb less water, which is why it is important to place directly in water after cutting.


Cutting stage Ranunculus Romance:

Llet the flowers open and close for 3 days and then cut the flowers for maximum size. (this gives you larger flowers and longer vase life) .Harvest Ranunculus Romance flowers only early in the morning, cutting stem at ground level.

Add a Chlorine tablet of Florissant 520 into a bucket with water to be placed in the cooler.

More Details
Pre-Order
Ranunculus Romance St. Tropez

Ranunculus Romance 'St. Tropez'

Pre-Order for Fall 2024

Storage After Arrival

Unpack immediately upon arrival, ventilate if not immediately planted. Store at 58-65°F.


Pre-sprouting (preparation)

Pre-sprounting gives the bulbs a better and more even start for optimal rooting and flower development.

Soak the bags for 12 hours in water at a temperature of 70-80 degree F with 5 gr GA3 (Gibberellic Acid) per 100 liter maintain temp. of 70-80 degree F during this 12 hour period. Make sure that the whole bag is submerged in water for the whole period!

Dip the bulbs in a fungicide for about 15 minutes: 1% of Topsin (active ingredients: thiofanaat-methyand 500 g/l) + ½% Securo (active ingredients: pyraclostrobin 100 g/l + folpet 300 g/l).

Directly after soaking the bulbs for 12 hours and fungicide dip you need to plant bulbs directly in the ground, keep the soil moist. When direct planting is not possible, store the Ranunculus in a coldstore at 41 degrees F.

It is very important to make sure that bulbs do not dry out after planting. (When bulbs dry out you will have loss of germination of the bulbs).


Prior to planting:

Take a soil sample (before you start preparing the soil and bulbs).

Fertilizing depends on a soil and water sample / analysis.

PH: 5.8 – 6.3;

EC: 1.3 to 1.5.


Planting/Spacing

Plant in a moist and well-drained soil free from weeds, with a soil temperature below the 50 degrees F.

Plant approximately ½ to ¾ inch deep, spacing bulbs 6-8 inches apart within the rows and space each row 6-8 inches apart, max of 4 rows per bed.

Recommended to use 1 layer of nets for support.

Plant the bulbs with the center of the bulb facing up and the end of the roots down. Be careful of not damaging the bulbs when planting. Water bulbs after planting so the soil is moist and encloses around the bulbs.


Watering

In the beginning, utilize overhead watering. Later, water only by drip hoses.

Very important especially in the beginning of the crop to keep the soil moist at all times!


Fertilization

Until some years ago, only phosphate was known for a better root development. Now we know that the plants have a preferred order as it comes to the absorption of elements. In the first stage of growth they need sulfur, followed in order by boron, silicon, calcium, nitrogen, magnesium and last but not least phosphorus.

The availability of these elements – especially boron, silicon and calcium – are essential for a good start of the plants. If one of these elements is not (enough) available, the chain will be broken and the growing process might start slower or with more problems.

Apply your fertilizer according to your soil sample.

Approximately 1 week after planting, drench the soil with a ‘cocktail’ so the rooting is easier:

•              Risolex;

•              Topsin;

•              Proplant/previcure.


Growing

First 2-4 weeks you will see your Ranunculus sprouting in the ground, try to keep night temperatures around 15 degrees C at night and during day as cool as possible.

When plants have sprouted and are growing for about 4-5 weeks and you have sufficient foliage on the bulbs growing lower the night temperature to as cool as possible. (no frost) You get best quality Ranunculus when growing is as cool as possible, you can grow as cool as 2-4 degrees C. if possible keep sides open of greenhouse.

During night keep well enough ventilated to prevent mildew.

Grow Ranunculus as cool as possible.


Diseases and insects:

-          Botrytis and Mildew: spray with Flint, Ortiva or Switch (the only remedy that works curatively at low temperatures) and use leaf fertilizers + trace elements to make the leaves harder.

-          Leaf spot: spray preventive with Luna Privilege and use leaf fertilizers + trace elements to make the leaves harder. Because this disease is very contagious, it is important to spray preventive

-          Xanthomonas: gives round, purple-red spots, often with a yellow circle. Spray preventively with, for example, Serenade or Ranman Top. And use leaf fertilizers + trace elements to make the leaves harder.

-          Erwina: spray preventive with copper oxychloride.

-          Do regular spotting in the greenhouse to check for: Caterpillars, Aphids (Tepeki), Leaf Miners (Vertimec), Spider Mites, Thrips and Whiteflies. And spray when needed.


Flower harvest and treatment during harvest:

Do not pull the stems from the bulb always cut with knife!

Cool water buckets night before in cooler to have cold water in harvesting buckets.

When flowers are cut early in the morning, as soon as possible place them in water at a temperature of 40 degrees F (even before bunching) and store them in a cooler. If the crop is harvested later during the day and the stem dries in and will absorb less water, which is why it is important to place directly in water after cutting.


Cutting stage Ranunculus Romance:

Llet the flowers open and close for 3 days and then cut the flowers for maximum size. (this gives you larger flowers and longer vase life) .Harvest Ranunculus Romance flowers only early in the morning, cutting stem at ground level.

Add a Chlorine tablet of Florissant 520 into a bucket with water to be placed in the cooler.

More Details
Pre-Order
Ranunculus Tecolote Cafe

Ranunculus Tecolote 'Cafe'

Storage After Arrival

Unpacked immediately upon arrival, ventilate if not immediately planted. Ideal storage temperatures are 50-60 degrees Fahrenheit

Planting in Zones 8 and warmer (Fall Planting)

Choose a location with well-draining soil and that does not still puddle 5 or 6 hours after a hard rain. Adding organic matter of at least 2-3in will improve drainage. Plant bulbs 4-6in apart, 2-3in deep. Water after planting to encourage root development. Refrain from watering until leaves sprout (most likely will occur in spring).

Planting in Zones 7 and colder (Spring Planting)

Growing in Containers:

Fill a container with drainage holes with good-quality, well-draining potting mix. Leaving 3-4 inches between bulbs will allow plenty of room for growth. Plant about 2 inches deep. Water after planting. Once the danger of a hard frost has passed, place the container in a location that receives full sun all day.

Growing in Outdoor Landscape Beds:

About a month before last average frost, soak the bulbs 3-4 hours (but not more than 4 hours) in tepid water before planting outside in a well-drained location with full sun.

Growing in Greenhouses:

Follow instructions for container growing. Ideal greenhouse temperatures are 45-48 degrees Fahrenheit at night and 58-65 degrees Fahrenheit during the day. Temperatures above 70 degrees Fahrenheit should be avoided. Following soaking instructions for outdoor landscape beds will give ranunculus a head start on growth.

Watering/Fertilizer/Growing

Begin watering once plants begin to grow being careful not to allow the soil to become soggy. Fertilizing is not necessary. In warmer climates, wait until foliage dies back before completely removing it. In colder climates, ranunculus are annuals and bulbs will need to be replaced each year. On average, ranunculus begin to bloom 90 days after planting. Flowering typically lasts approximately 6 to 7 weeks for fall planted bulbs and 4 to 6 weeks for spring planted bulbs.

More Details
Pre-Order
Ranunculus Tecolote Flamenco

Ranunculus Tecolote 'Flamenco'

Storage After Arrival

Unpacked immediately upon arrival, ventilate if not immediately planted. Ideal storage temperatures are 50-60 degrees Fahrenheit

Planting in Zones 8 and warmer (Fall Planting)

Choose a location with well-draining soil and that does not still puddle 5 or 6 hours after a hard rain. Adding organic matter of at least 2-3in will improve drainage. Plant bulbs 4-6in apart, 2-3in deep. Water after planting to encourage root development. Refrain from watering until leaves sprout (most likely will occur in spring).

Planting in Zones 7 and colder (Spring Planting)

Growing in Containers:

Fill a container with drainage holes with good-quality, well-draining potting mix. Leaving 3-4 inches between bulbs will allow plenty of room for growth. Plant about 2 inches deep. Water after planting. Once the danger of a hard frost has passed, place the container in a location that receives full sun all day.

Growing in Outdoor Landscape Beds:

About a month before last average frost, soak the bulbs 3-4 hours (but not more than 4 hours) in tepid water before planting outside in a well-drained location with full sun.

Growing in Greenhouses:

Follow instructions for container growing. Ideal greenhouse temperatures are 45-48 degrees Fahrenheit at night and 58-65 degrees Fahrenheit during the day. Temperatures above 70 degrees Fahrenheit should be avoided. Following soaking instructions for outdoor landscape beds will give ranunculus a head start on growth.

Watering/Fertilizer/Growing

Begin watering once plants begin to grow being careful not to allow the soil to become soggy. Fertilizing is not necessary. In warmer climates, wait until foliage dies back before completely removing it. In colder climates, ranunculus are annuals and bulbs will need to be replaced each year. On average, ranunculus begin to bloom 90 days after planting. Flowering typically lasts approximately 6 to 7 weeks for fall planted bulbs and 4 to 6 weeks for spring planted bulbs.

More Details
Pre-Order
Ranunculus Tecolote Gold

Ranunculus Tecolote 'Gold'

Storage After Arrival

Unpacked immediately upon arrival, ventilate if not immediately planted. Ideal storage temperatures are 50-60 degrees Fahrenheit

Planting in Zones 8 and warmer (Fall Planting)

Choose a location with well-draining soil and that does not still puddle 5 or 6 hours after a hard rain. Adding organic matter of at least 2-3in will improve drainage. Plant bulbs 4-6in apart, 2-3in deep. Water after planting to encourage root development. Refrain from watering until leaves sprout (most likely will occur in spring).

Planting in Zones 7 and colder (Spring Planting)

Growing in Containers:

Fill a container with drainage holes with good-quality, well-draining potting mix. Leaving 3-4 inches between bulbs will allow plenty of room for growth. Plant about 2 inches deep. Water after planting. Once the danger of a hard frost has passed, place the container in a location that receives full sun all day.

Growing in Outdoor Landscape Beds:

About a month before last average frost, soak the bulbs 3-4 hours (but not more than 4 hours) in tepid water before planting outside in a well-drained location with full sun.

Growing in Greenhouses:

Follow instructions for container growing. Ideal greenhouse temperatures are 45-48 degrees Fahrenheit at night and 58-65 degrees Fahrenheit during the day. Temperatures above 70 degrees Fahrenheit should be avoided. Following soaking instructions for outdoor landscape beds will give ranunculus a head start on growth.

Watering/Fertilizer/Growing

Begin watering once plants begin to grow being careful not to allow the soil to become soggy. Fertilizing is not necessary. In warmer climates, wait until foliage dies back before completely removing it. In colder climates, ranunculus are annuals and bulbs will need to be replaced each year. On average, ranunculus begin to bloom 90 days after planting. Flowering typically lasts approximately 6 to 7 weeks for fall planted bulbs and 4 to 6 weeks for spring planted bulbs.

More Details
Pre-Order
Ranunculus Tecolote Merlot

Ranunculus Tecolote 'Merlot'

Storage After Arrival

Unpacked immediately upon arrival, ventilate if not immediately planted. Ideal storage temperatures are 50-60 degrees Fahrenheit

Planting in Zones 8 and warmer (Fall Planting)

Choose a location with well-draining soil and that does not still puddle 5 or 6 hours after a hard rain. Adding organic matter of at least 2-3in will improve drainage. Plant bulbs 4-6in apart, 2-3in deep. Water after planting to encourage root development. Refrain from watering until leaves sprout (most likely will occur in spring).

Planting in Zones 7 and colder (Spring Planting)

Growing in Containers:

Fill a container with drainage holes with good-quality, well-draining potting mix. Leaving 3-4 inches between bulbs will allow plenty of room for growth. Plant about 2 inches deep. Water after planting. Once the danger of a hard frost has passed, place the container in a location that receives full sun all day.

Growing in Outdoor Landscape Beds:

About a month before last average frost, soak the bulbs 3-4 hours (but not more than 4 hours) in tepid water before planting outside in a well-drained location with full sun.

Growing in Greenhouses:

Follow instructions for container growing. Ideal greenhouse temperatures are 45-48 degrees Fahrenheit at night and 58-65 degrees Fahrenheit during the day. Temperatures above 70 degrees Fahrenheit should be avoided. Following soaking instructions for outdoor landscape beds will give ranunculus a head start on growth.

Watering/Fertilizer/Growing

Begin watering once plants begin to grow being careful not to allow the soil to become soggy. Fertilizing is not necessary. In warmer climates, wait until foliage dies back before completely removing it. In colder climates, ranunculus are annuals and bulbs will need to be replaced each year. On average, ranunculus begin to bloom 90 days after planting. Flowering typically lasts approximately 6 to 7 weeks for fall planted bulbs and 4 to 6 weeks for spring planted bulbs.

More Details
Pre-Order
Ranunculus Tecolote Pastel

Ranunculus Tecolote 'Pastel'

Storage After Arrival

Unpacked immediately upon arrival, ventilate if not immediately planted. Ideal storage temperatures are 50-60 degrees Fahrenheit

Planting in Zones 8 and warmer (Fall Planting)

Choose a location with well-draining soil and that does not still puddle 5 or 6 hours after a hard rain. Adding organic matter of at least 2-3in will improve drainage. Plant bulbs 4-6in apart, 2-3in deep. Water after planting to encourage root development. Refrain from watering until leaves sprout (most likely will occur in spring).

Planting in Zones 7 and colder (Spring Planting)

Growing in Containers:

Fill a container with drainage holes with good-quality, well-draining potting mix. Leaving 3-4 inches between bulbs will allow plenty of room for growth. Plant about 2 inches deep. Water after planting. Once the danger of a hard frost has passed, place the container in a location that receives full sun all day.

Growing in Outdoor Landscape Beds:

About a month before last average frost, soak the bulbs 3-4 hours (but not more than 4 hours) in tepid water before planting outside in a well-drained location with full sun.

Growing in Greenhouses:

Follow instructions for container growing. Ideal greenhouse temperatures are 45-48 degrees Fahrenheit at night and 58-65 degrees Fahrenheit during the day. Temperatures above 70 degrees Fahrenheit should be avoided. Following soaking instructions for outdoor landscape beds will give ranunculus a head start on growth.

Watering/Fertilizer/Growing

Begin watering once plants begin to grow being careful not to allow the soil to become soggy. Fertilizing is not necessary. In warmer climates, wait until foliage dies back before completely removing it. In colder climates, ranunculus are annuals and bulbs will need to be replaced each year. On average, ranunculus begin to bloom 90 days after planting. Flowering typically lasts approximately 6 to 7 weeks for fall planted bulbs and 4 to 6 weeks for spring planted bulbs.

More Details
Pre-Order
Ranunculus Tecolote Picotee

Ranunculus Tecolote 'Picotee'

Storage After Arrival

Unpacked immediately upon arrival, ventilate if not immediately planted. Ideal storage temperatures are 50-60 degrees Fahrenheit

Planting in Zones 8 and warmer (Fall Planting)

Choose a location with well-draining soil and that does not still puddle 5 or 6 hours after a hard rain. Adding organic matter of at least 2-3in will improve drainage. Plant bulbs 4-6in apart, 2-3in deep. Water after planting to encourage root development. Refrain from watering until leaves sprout (most likely will occur in spring).

Planting in Zones 7 and colder (Spring Planting)

Growing in Containers:

Fill a container with drainage holes with good-quality, well-draining potting mix. Leaving 3-4 inches between bulbs will allow plenty of room for growth. Plant about 2 inches deep. Water after planting. Once the danger of a hard frost has passed, place the container in a location that receives full sun all day.

Growing in Outdoor Landscape Beds:

About a month before last average frost, soak the bulbs 3-4 hours (but not more than 4 hours) in tepid water before planting outside in a well-drained location with full sun.

Growing in Greenhouses:

Follow instructions for container growing. Ideal greenhouse temperatures are 45-48 degrees Fahrenheit at night and 58-65 degrees Fahrenheit during the day. Temperatures above 70 degrees Fahrenheit should be avoided. Following soaking instructions for outdoor landscape beds will give ranunculus a head start on growth.

Watering/Fertilizer/Growing

Begin watering once plants begin to grow being careful not to allow the soil to become soggy. Fertilizing is not necessary. In warmer climates, wait until foliage dies back before completely removing it. In colder climates, ranunculus are annuals and bulbs will need to be replaced each year. On average, ranunculus begin to bloom 90 days after planting. Flowering typically lasts approximately 6 to 7 weeks for fall planted bulbs and 4 to 6 weeks for spring planted bulbs.

More Details
Pre-Order
Ranunculus Tecolote Pink

Ranunculus Tecolote 'Pink'

Storage After Arrival

Unpacked immediately upon arrival, ventilate if not immediately planted. Ideal storage temperatures are 50-60 degrees Fahrenheit

Planting in Zones 8 and warmer (Fall Planting)

Choose a location with well-draining soil and that does not still puddle 5 or 6 hours after a hard rain. Adding organic matter of at least 2-3in will improve drainage. Plant bulbs 4-6in apart, 2-3in deep. Water after planting to encourage root development. Refrain from watering until leaves sprout (most likely will occur in spring).

Planting in Zones 7 and colder (Spring Planting)

Growing in Containers:

Fill a container with drainage holes with good-quality, well-draining potting mix. Leaving 3-4 inches between bulbs will allow plenty of room for growth. Plant about 2 inches deep. Water after planting. Once the danger of a hard frost has passed, place the container in a location that receives full sun all day.

Growing in Outdoor Landscape Beds:

About a month before last average frost, soak the bulbs 3-4 hours (but not more than 4 hours) in tepid water before planting outside in a well-drained location with full sun.

Growing in Greenhouses:

Follow instructions for container growing. Ideal greenhouse temperatures are 45-48 degrees Fahrenheit at night and 58-65 degrees Fahrenheit during the day. Temperatures above 70 degrees Fahrenheit should be avoided. Following soaking instructions for outdoor landscape beds will give ranunculus a head start on growth.

Watering/Fertilizer/Growing

Begin watering once plants begin to grow being careful not to allow the soil to become soggy. Fertilizing is not necessary. In warmer climates, wait until foliage dies back before completely removing it. In colder climates, ranunculus are annuals and bulbs will need to be replaced each year. On average, ranunculus begin to bloom 90 days after planting. Flowering typically lasts approximately 6 to 7 weeks for fall planted bulbs and 4 to 6 weeks for spring planted bulbs.

More Details
Pre-Order
Ranunculus Tecolote Purple

Ranunculus Tecolote 'Purple'

Storage After Arrival

Unpacked immediately upon arrival, ventilate if not immediately planted. Ideal storage temperatures are 50-60 degrees Fahrenheit

Planting in Zones 8 and warmer (Fall Planting)

Choose a location with well-draining soil and that does not still puddle 5 or 6 hours after a hard rain. Adding organic matter of at least 2-3in will improve drainage. Plant bulbs 4-6in apart, 2-3in deep. Water after planting to encourage root development. Refrain from watering until leaves sprout (most likely will occur in spring).

Planting in Zones 7 and colder (Spring Planting)

Growing in Containers:

Fill a container with drainage holes with good-quality, well-draining potting mix. Leaving 3-4 inches between bulbs will allow plenty of room for growth. Plant about 2 inches deep. Water after planting. Once the danger of a hard frost has passed, place the container in a location that receives full sun all day.

Growing in Outdoor Landscape Beds:

About a month before last average frost, soak the bulbs 3-4 hours (but not more than 4 hours) in tepid water before planting outside in a well-drained location with full sun.

Growing in Greenhouses:

Follow instructions for container growing. Ideal greenhouse temperatures are 45-48 degrees Fahrenheit at night and 58-65 degrees Fahrenheit during the day. Temperatures above 70 degrees Fahrenheit should be avoided. Following soaking instructions for outdoor landscape beds will give ranunculus a head start on growth.

Watering/Fertilizer/Growing

Begin watering once plants begin to grow being careful not to allow the soil to become soggy. Fertilizing is not necessary. In warmer climates, wait until foliage dies back before completely removing it. In colder climates, ranunculus are annuals and bulbs will need to be replaced each year. On average, ranunculus begin to bloom 90 days after planting. Flowering typically lasts approximately 6 to 7 weeks for fall planted bulbs and 4 to 6 weeks for spring planted bulbs.

More Details
Pre-Order