Pre-Order for Fall 2024
Crocus - Pre-Order for Fall 2024
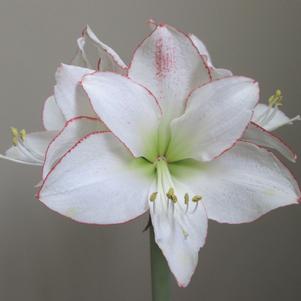
Hippeastrum Holland 'Picotee Petticoat'
Amaryllis - Pre-Order for Fall 2024
We carry 147 plants that match your search request. We've included all matches below. Click on any plant to learn additional details.
Where to Plant:
Choose a location that receives light to moderate shade. Avoid full sun.
How to Plant:
Astilbe prefer rich, well draining soil. Amend heavy soils with peat moss, perlite, compost, or course sand to improve drainage. Plant astilbe so that the crown is at the same level as the top of the soil. Make sure the holes are twice as wide as the plants and 4 to 6 inches deep. Place the plants so that the roots are fanned slightly and pointing downwards, with the crown planted 1 to 2 inches below the ground level. Cover the roots with soil and press firmly.
Water:
Keep soil consistantly moist, but avoid over watering. Do not allow to dry out between waterings.
More DetailsWhere to Plant:
Choose a location that receives light to moderate shade. Avoid full sun.
How to Plant:
Astilbe prefer rich, well draining soil. Amend heavy soils with peat moss, perlite, compost, or course sand to improve drainage. Plant astilbe so that the crown is at the same level as the top of the soil. Make sure the holes are twice as wide as the plants and 4 to 6 inches deep. Place the plants so that the roots are fanned slightly and pointing downwards, with the crown planted 1 to 2 inches below the ground level. Cover the roots with soil and press firmly.
Water:
Keep soil consistantly moist, but avoid over watering. Do not allow to dry out between waterings.
More Detailsshiny green foliage, clear blue flowers
More DetailsWhere To Plant
For best growth, plant convallaria in well drainging soil where they will receive light to moderate shade. Amend soil with compost or
other organic material to improve drainage.
How To Plant
Plant roots so that the tops just barely poke above the soil. Water generously to settle soil around the roots.
Where To Plant
Bleeding heart will grow best in partial to full shade. Ideally, bleeding heart should have morning sun and afternoon shade for best flowering.
How To Plant
Bleeding heart prefer a well draining, slightly acidic soil (pH 6.0 to 6.5), but will tolerate a pH up to 7.5. Apply compost or a general purpose, granular fertilizer in spring. Plant bareroot bleeding heart with the crown 1-2" below the soil line. If grown in poorly drained, wet soil, the crowns of the plants may rot. Avoid these soils and allow good air circulation.
More DetailsWhere To Plant
Bleeding heart will grow best in partial to full shade. Ideally, bleeding heart should have morning sun and afternoon shade for best flowering.
How To Plant
Bleeding heart prefer a well draining, slightly acidic soil (pH 6.0 to 6.5), but will tolerate a pH up to 7.5. Apply compost or a general purpose, granular fertilizer in spring. Plant bareroot bleeding heart with the crown 1-2" below the soil line. If grown in poorly drained, wet soil, the crowns of the plants may rot. Avoid these soils and allow good air circulation.
More DetailsHow To Plant
Geraniums prefer full sun and a well-drained, moderately rich soil. They can handle partial shade, but become more prone to mildew if kept damp. Geraniums are not particular about soil pH, but a neutral to slightly acid soil is ideal. (5.8 - 7.0)
Mid Season Care
Shearing plants back to basal growth after blooming will improve their look and encourage reblooming. The plants fill back in within weeks.
More DetailsSoil and Preparation:
Daylilies flower best when planted in full sun (6 hours/day), with moist, yet well-drained soil. Daylilies will grow in a wide range of soils, from sand to heavy clay, and in a wide range of soil pHs. Clay soils can be improved by the addition of compost, humus or peat moss, or sand which will help make it more friable. Sandy soil will benefit from the addition of compost, humus or peat moss which will serve to increase water retention. Amend the soil withcompost before planting. Space plants 12 to 18 inches apart and plant so the crown is about 1 inch below the soil surface. Water well and mulch with bark or straw to conserve moisture and prevent weeds from growing.
Planting:
Dig a hole large enough to accommodate the root mass, usually about 6-8" deep. Once the hole is prepared, place the daylily upright, without cramming it into the space. Holding it so the crown (top of the roots) is about one inch below the surface of the ground, spread the roots out in the hole and loosely push soil over the roots until the hole is nearly full. Press the soil down around the roots, without covering any green of the plant. Leave a slight depression, or water reservoir, around the plant, about 1/2" deep.
Watering:
Watering is most important in spring when the plants are making scapes and buds, and in the summer during the bloom season. Daylilies benefit more from deep watering, which reaches 8 to 10 inches into the soil, than from a succession of brief, surface waterings.
Fertilization During Growing:
They do not require fertilization other than a yearly addition of compost.
More DetailsStorage After Arrival
Storing iris is not advised. They should be planted as soon as possible. If they have to be stored, they should be kept in a cool area with good air circulation.
Soil
Best grown in rich soil, evenly moist areas such as along water edges. Well established plants can tolerate some drought.
Planting
Plant rhizomes 1 to 2 inches deep, and keep moist for 6 to 8 weeks. Best planting times vary by region - fall in the warmer regions and spring in cooler regions. Blooms best after a cold period in winter.
Light
Grow in full sun but protect from hot afternoon sun in warmer regions.
More Details
Storage After Arrival
Storing iris is not advised. They should be planted as soon as possible. If they have to be stored, they should be kept in a cool area with good air circulation.
Soil
Best grown in rich soil, evenly moist areas such as along water edges. Well established plants can tolerate some drought.
Planting
Plant rhizomes 1 to 2 inches deep, and keep moist for 6 to 8 weeks. Best planting times vary by region - fall in the warmer regions and spring in cooler regions. Blooms best after a cold period in winter.
Light
Grow in full sun but protect from hot afternoon sun in warmer regions.
More Details
Planting
Liriope does well in a variety of areas - edging walkways, under trees, in rock gardens, woodland settings, or as a ground cover. Water regularly in first year.
Soil
Prefers well-drained to dry soil and can tolerate drought once established. Water regularly the first year.
Sun
Tolerates full sun to full shade but flowers best in part shade.
More DetailsSoil and Preparation
Peonies prefer well-draining, humus-rich moist soil. Amend heavy or very sandy soil with compost. Additionally, 1 cup of bonemeal can be used to amend the soil prior to planting. Choose a location in full sun, but one that provides ample growing room along with protection from strong winds.
Planting
Dig a a hole large enough to accommodate the roots and set the root so the eyes face upward. Fill in the hole, making sure to keep the peony's eyes/buds not deeper than 2" below the soil line. Water thoroughly to settle the soil around the roots.
Fertilization During Growing
They do not require fertilization other than a yearly addition of compost unless a soil test shows a deficiency in nutrients.
Cutting Guidelines
Years 1 & 2: Do not cut any blooms. Dis-budding is recommended to encourage root growth and overall plant development.
Year 3: For 2/3 eye roots - Cut 1/3 of the total blooms; For 3/5 eye roots - Cut 50% of the blooms
Year 4: Cut 70% of the total blooms
More DetailsHow To Plant
Geraniums prefer full sun and a well-drained, moderately rich soil. They can handle partial shade, but become more prone to mildew if kept damp. Geraniums are not particular about soil pH, but a neutral to slightly acid soil is ideal. (5.8 - 7.0)
Mid Season Care
Shearing plants back to basal growth after blooming will improve their look and encourage reblooming. The plants fill back in within weeks.
More Details