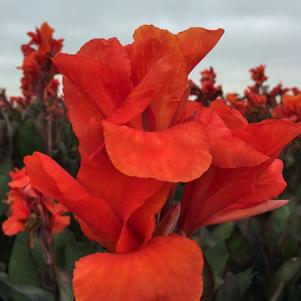
Canna
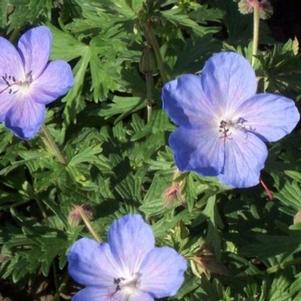
Cranesbill
We carry 95 plants that match your search request. We've included all matches below. Click on any plant to learn additional details.

Storage After Arrival
Unpacked immediately upon arrival, ventilate if not immediately planted. Ideal storage temperatures are 50-60 degrees Fahrenheit
Planting in Zones 8 and warmer (Fall Planting)
Choose a location with well-draining soil and that does not still puddle 5 or 6 hours after a hard rain. Adding organic matter of at least 2-3in will improve drainage. Plant bulbs 4-6in apart, 2-3in deep. Water after planting to encourage root development. Refrain from watering until leaves sprout (most likely will occur in spring).
Planting in Zones 7 and colder (Spring Planting)
Growing in Containers:
Fill a container with drainage holes with good-quality, well-draining potting mix. Leaving 3-4 inches between bulbs will allow plenty of room for growth. Plant about 2 inches deep. Water after planting. Once the danger of a hard frost has passed, place the container in a location that receives full sun all day.
Growing in Outdoor Landscape Beds:
About a month before last average frost, soak the bulbs 3-4 hours (but not more than 4 hours) in tepid water before planting outside in a well-drained location with full sun.
Growing in Greenhouses:
Follow instructions for container growing. Ideal greenhouse temperatures are 45-48 degrees Fahrenheit at night and 58-65 degrees Fahrenheit during the day. Temperatures above 70 degrees Fahrenheit should be avoided. Following soaking instructions for outdoor landscape beds will give ranunculus a head start on growth.
Watering/Fertilizer/Growing
Begin watering once plants begin to grow being careful not to allow the soil to become soggy. Fertilizing is not necessary. In warmer climates, wait until foliage dies back before completely removing it. In colder climates, ranunculus are annuals and bulbs will need to be replaced each year. On average, ranunculus begin to bloom 90 days after planting. Flowering typically lasts approximately 6 to 7 weeks for fall planted bulbs and 4 to 6 weeks for spring planted bulbs.
More Details

Soil and Preparation:
Peonies prefer well-draining, humus-rich moist soil. Amend heavy or very sandy soil with compost. Additionally, 1 cup of bonemeal can be used to amend the soil prior to planting. Choose a location in full sun, but one that provides ample growing room along with protection from strong winds.
Planting:
Dig a a hole large enough to accommodate the roots and set the root so the eyes face upward. Fill in the hole, making sure to keep the peony's eyes/buds not deeper than 2" below the soil line. Water thoroughly to settle the soil around the roots.
Fertilization During Growing:
They do not require fertilization other than a yearly addition of compost unless a soil test shows a deficiency in nutrients.
More Details
Storage After Arrival
Unpacked immediately upon arrival, ventilate if not immediately planted. Ideal storage temperatures are 50-60 degrees Fahrenheit
Planting in Zones 8 and warmer (Fall Planting)
Choose a location with well-draining soil and that does not still puddle 5 or 6 hours after a hard rain. Adding organic matter of at least 2-3in will improve drainage. Plant bulbs 4-6in apart, 2-3in deep. Water after planting to encourage root development. Refrain from watering until leaves sprout (most likely will occur in spring).
Planting in Zones 7 and colder (Spring Planting)
Growing in Containers:
Fill a container with drainage holes with good-quality, well-draining potting mix. Leaving 3-4 inches between bulbs will allow plenty of room for growth. Plant about 2 inches deep. Water after planting. Once the danger of a hard frost has passed, place the container in a location that receives full sun all day.
Growing in Outdoor Landscape Beds:
About a month before last average frost, soak the bulbs 3-4 hours (but not more than 4 hours) in tepid water before planting outside in a well-drained location with full sun.
Growing in Greenhouses:
Follow instructions for container growing. Ideal greenhouse temperatures are 45-48 degrees Fahrenheit at night and 58-65 degrees Fahrenheit during the day. Temperatures above 70 degrees Fahrenheit should be avoided. Following soaking instructions for outdoor landscape beds will give ranunculus a head start on growth.
Watering/Fertilizer/Growing
Begin watering once plants begin to grow being careful not to allow the soil to become soggy. Fertilizing is not necessary. In warmer climates, wait until foliage dies back before completely removing it. In colder climates, ranunculus are annuals and bulbs will need to be replaced each year. On average, ranunculus begin to bloom 90 days after planting. Flowering typically lasts approximately 6 to 7 weeks for fall planted bulbs and 4 to 6 weeks for spring planted bulbs.
More Details
How To Plant
Dig hole 1/3 larger than root system or bulb and make the hole 2-3 " deep. Add a thin layer of base soil back in the bottom of the hole.
Root systems (rhizomes) like Trillium and Virginia Blue Bells should be placed on their side, but bulbs and corms should be placed
upright in the hole so that the pointed end is upwards. Fill with soil and water thoroughly.
Watering
Water every three to four days for the first week if it does not rain.


How To Plant
Geraniums prefer full sun and a well-drained, moderately rich soil. They can handle partial shade, but become more prone to mildew if kept damp. Geraniums are not particular about soil pH, but a neutral to slightly acid soil is ideal. (5.8 - 7.0)
Mid Season Care
Shearing plants back to basal growth after blooming will improve their look and encourage reblooming. The plants fill back in within weeks.
More Details
How To Plant
Geraniums prefer full sun and a well-drained, moderately rich soil. They can handle partial shade, but become more prone to mildew if kept damp. Geraniums are not particular about soil pH, but a neutral to slightly acid soil is ideal. (5.8 - 7.0)
Mid Season Care
Shearing plants back to basal growth after blooming will improve their look and encourage reblooming. The plants fill back in within weeks.
More DetailsHow To Plant
Geraniums prefer full sun and a well-drained, moderately rich soil. They can handle partial shade, but become more prone to mildew if kept damp. Geraniums are not particular about soil pH, but a neutral to slightly acid soil is ideal. (5.8 - 7.0)
Mid Season Care
Shearing plants back to basal growth after blooming will improve their look and encourage reblooming. The plants fill back in within weeks.
More Details
How To Plant
Geraniums prefer full sun and a well-drained, moderately rich soil. They can handle partial shade, but become more prone to mildew if kept damp. Geraniums are not particular about soil pH, but a neutral to slightly acid soil is ideal. (5.8 - 7.0)
Mid Season Care
Shearing plants back to basal growth after blooming will improve their look and encourage reblooming. The plants fill back in within weeks.
More Details
Planting
Bearded iris grow best in well-drained soil. Sloped or raised beds help ensure good drainage. Coarse sand or humus may be added to improve drainage. The ideal soil pH is 6.8 (slightly acidic). Iris do best with at least 6 hours a day of full sun. Insufficient sunlight will result in iris producing foliage, but no blooms.
When to Plant
For best results, iris should be planted at least six weeks before the first hard frost in your area. Establishing a good root system before the growing season ends is imperative.
Planting
Plant iris so the tops of the rhizomes are exposed and the roots are spread out facing downward into the soil. In very light soil or extremely hot climates, covering the rhizome with a light covering of soil by be used to shade the rhizome and prevent scorching. A common mistake is to plant bearded iris too deep. Ideally, the tops of the rhizomes should be visible above the soil level. Bearded iris planted 12 to 24 inches apart will require less frequent thinning. Watering in newly planted rhizomes will help settle the soil and encourage root growth.
Watering
Moisture helps establish root systems of newly planted rhizomes. Deep watering at long intervals is preferred to frequent shallow waterings. Unless the growing area is very dry, iris don’t need to be regularly watered. Over-watering is a common error.
Fertilizer
Use only a low-nitrogen fertilizer (6-10-10), bone meal or superphospate. A light application in the spring when springs bulbs such as tulips are blooming and a second light application about a month later is all the is required. Avoid the use of anything high in nitrogen. Over feeding iris with anything high in nitrogen will prevent the plant from producing blooms.
Growing Iris in Containers
Use a roomy pot with good drainage. Bearded iris need a one gallon pot or larger. Fill to one inch below the rim of the container with well-draining soil that is low in nitrogen. Plant rhizomes so that the tops of the rhizomes are exposed. Water only when the top two inches of soil are dry. Over-watering will encourage rot. Containers can be over-wintered outdoors, but protect pots from freezing by moving into an unheated garage or other unheated, protected location when sustained daytime temperatures are below 32F or nighttime temperatures are below 25F. In climates with harsh winter weather, sink the pot into the soil and cover with mulch. Divide and transplant iris every few years or as they begin overcrowding the pot.
More Details
Storage After Arrival
Storing iris is not advised. They should be planted as soon as possible. If they have to be stored, they should be kept in a cool area with good air circulation.
Soil
Best grown in rich soil, evenly moist areas such as along water edges. Well established plants can tolerate some drought.
Planting
Plant rhizomes 1 to 2 inches deep, and keep moist for 6 to 8 weeks. Best planting times vary by region - fall in the warmer regions and spring in cooler regions. Blooms best after a cold period in winter.
Light
Grow in full sun but protect from hot afternoon sun in warmer regions.
More Details

Storage After Arrival
Storing iris is not advised. They should be planted as soon as possible. If they have to be stored, they should be kept in a cool area with good air circulation.
Soil
Best grown in medium to wet humusy soil. Also grows well along a moist shoreline, since it can tolerate shallow standing water.
Light
Grow in full sun to part shade.
Naturalizing
Will spread slowly in clumps to easily naturalize in an area with good conditions.
More Details

Planting
Plant corms 5 inches deep, with spacing of 2-3 inches. Can also grow in containers with up to 6 corms in a 6 inch pot. Keep moist during growing season, but allow dry out after plants stop blooming in mid-summer. Corms can be dug up and overwintered in planting medium in a cool, dry area.
Soil
Best grown in well-draining soil with a high amount of organic matter.
Light
Grow in full sun to part shade.
More Details

Soil and Preparation
Peonies prefer well-draining, humus-rich moist soil. Amend heavy or very sandy soil with compost. Additionally, 1 cup of bonemeal can be used to amend the soil prior to planting. Choose a location in full sun, but one that provides ample growing room along with protection from strong winds.
Planting
Dig a a hole large enough to accommodate the roots and set the root so the eyes face upward. Fill in the hole, making sure to keep the peony's eyes/buds not deeper than 2" below the soil line. Water thoroughly to settle the soil around the roots.
Fertilization During Growing
They do not require fertilization other than a yearly addition of compost unless a soil test shows a deficiency in nutrients.
Cutting Guidelines
Years 1 & 2: Do not cut any blooms. Dis-budding is recommended to encourage root growth and overall plant development.
Year 3: For 2/3 eye roots - Cut 1/3 of the total blooms; For 3/5 eye roots - Cut 50% of the blooms
Year 4: Cut 70% of the total blooms
More Details

How To Plant
Geraniums prefer full sun and a well-drained, moderately rich soil. They can handle partial shade, but become more prone to mildew if kept damp. Geraniums are not particular about soil pH, but a neutral to slightly acid soil is ideal. (5.8 - 7.0)
Mid Season Care
Shearing plants back to basal growth after blooming will improve their look and encourage reblooming. The plants fill back in within weeks.
More Details

How To Plant
Dig hole 1/3 larger than root system or bulb and make the hole 2-3 " deep. Add a thin layer of base soil back in the bottom of the hole.
Root systems (rhizomes) like Trillium and Virginia Blue Bells should be placed on their side, but bulbs and corms should be placed
upright in the hole so that the pointed end is upwards. Fill with soil and water thoroughly.
Watering
Water every three to four days for the first week if it does not rain.